
Stop double booking: two ways to share your Outlook calendar
Keeping your team, clients, and partners on the same page should not feel like a game of telephone. Whether you are coordinating schedules inside your team or letting external clients see when you are free, Microsoft Outlook gives you two distinct ways to share your calendar. Here is how to set up both, fix the most common problem people hit, and decide which option fits your workflow best.
Two ways to share, at a glance
Before the steps, here is the quick version of what each method is for. A published link is a web address anyone can open in a browser. Direct sharing sends an invite to a specific person inside your organisation.
Share via a web link
Best for clients and external partners. Publishing a web link means the recipient does not need an Outlook account or any special software. The link opens in any standard web browser.
Direct user sharing
Best for internal teams. You invite a specific colleague by email address and choose whether they can view your schedule or fully edit it, which suits close collaboration.
Method 1: share via a web link
If you need to share your schedule with someone who does not use Outlook, publishing a web link is your best option. Outlook generates a link that opens directly in any browser, so the recipient does not need an account.
Open settings
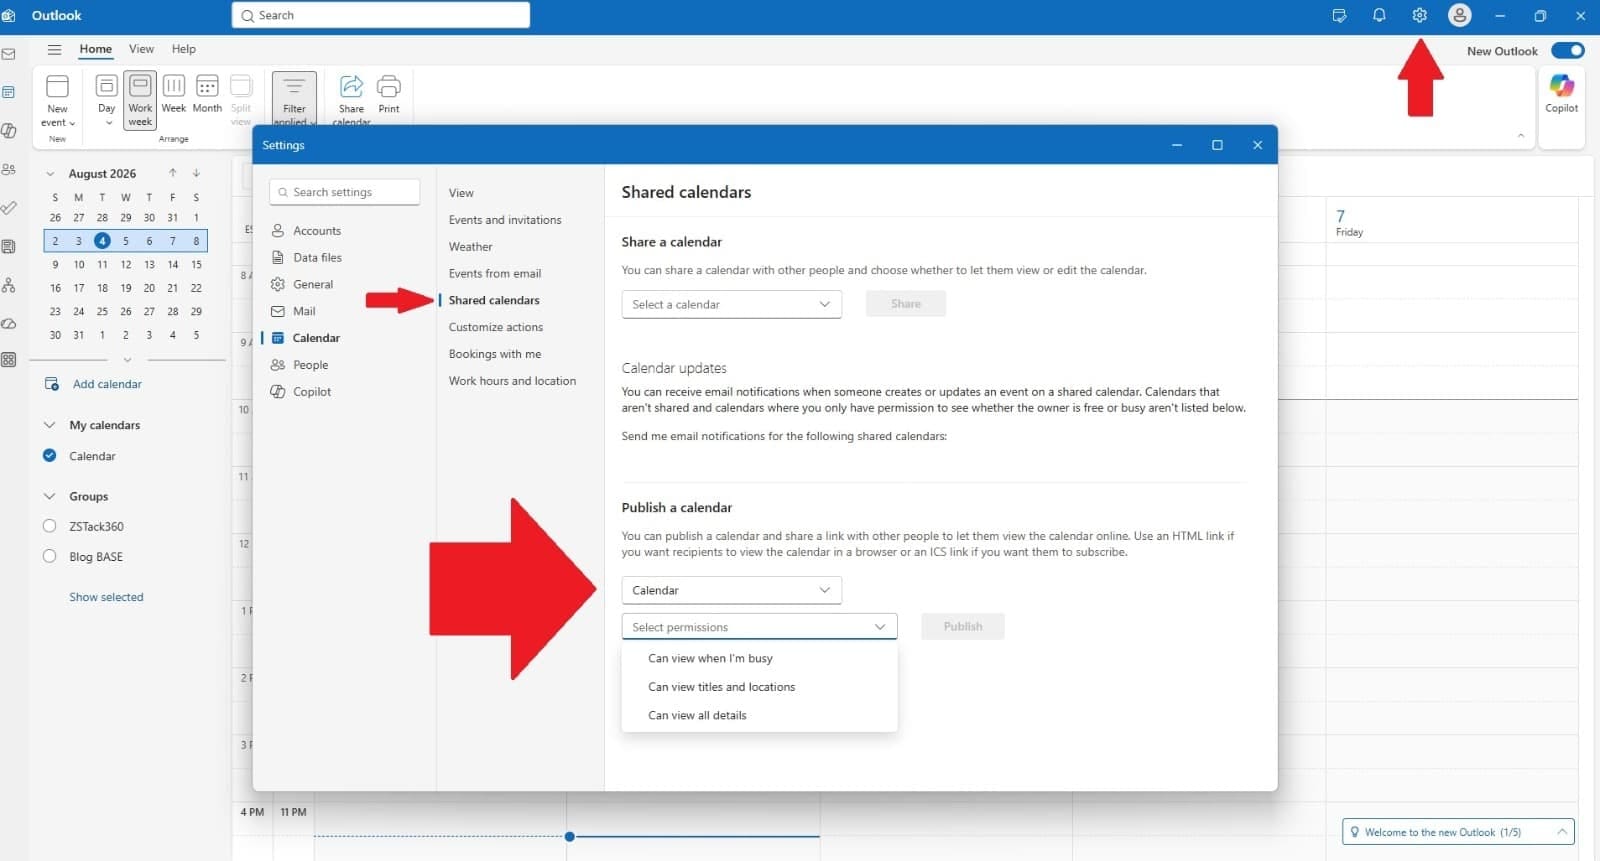
Open Outlook on the web and click the Settings icon at the top of the page.
Go to Shared calendars
Select Shared calendars from the left sidebar menu.
Pick the calendar to publish
Under Publish my calendar link, select the specific calendar you want to share.
Choose your permissions
Decide how much detail recipients see. For example, select Can view all details so they can see your full schedule.
Publish the calendar
Click Publish. Outlook generates two links, an ICS link and an HTML link.
Copy and send the HTML link
Right click the HTML link, select Copy link, then paste it into an email to your recipient.
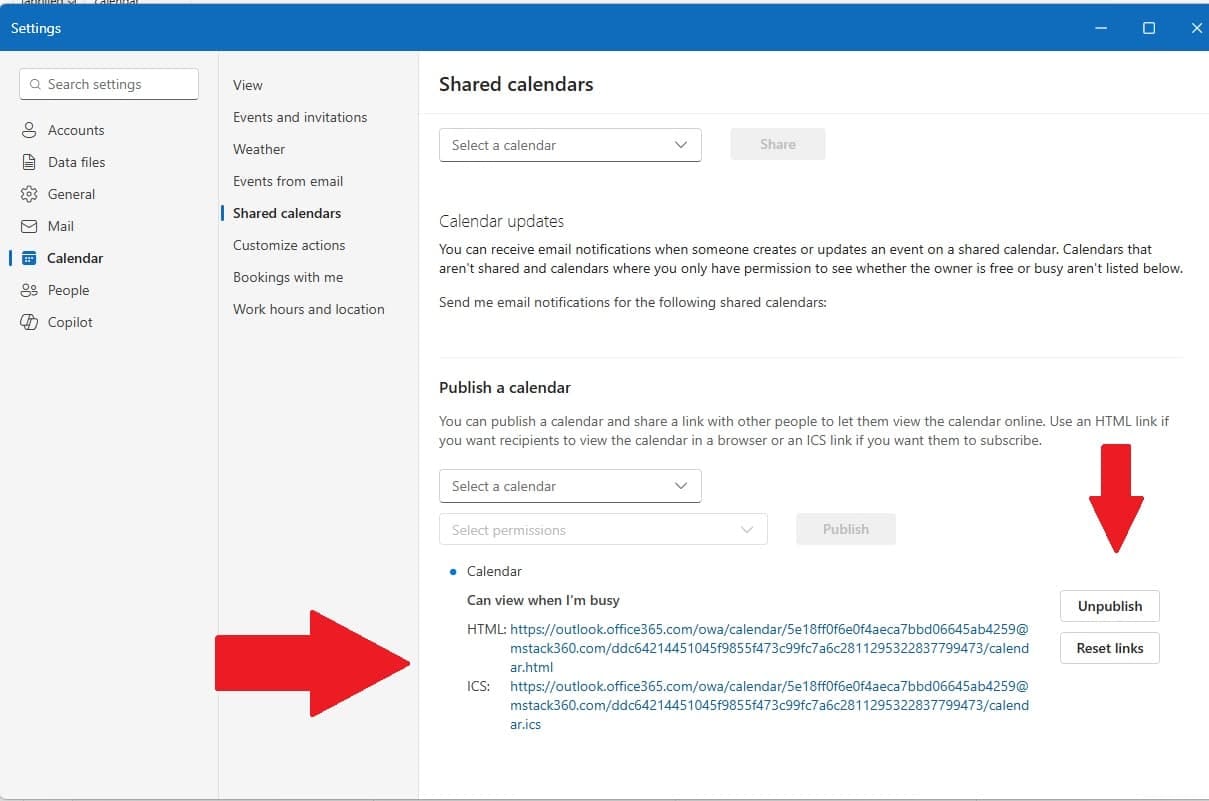
Anyone with this link can view your schedule, so only send it to people you trust, or choose more restrictive permissions to hide specific event details. If you ever want to stop sharing, go back to Shared calendars in settings and click Unpublish next to the calendar.
Method 2: direct user sharing
When you are working closely with colleagues who need visibility, or even the ability to manage your schedule, direct user sharing is the ideal path. You invite specific people and choose exactly what they can do.
Open your calendar
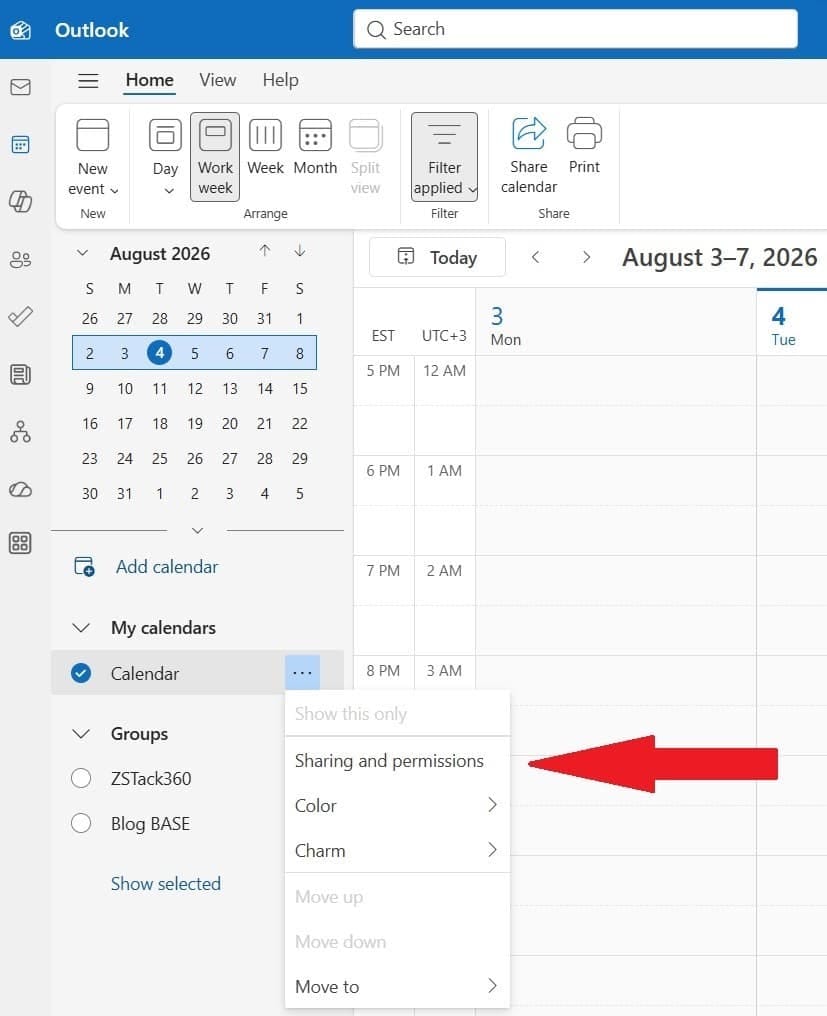
Open Outlook and navigate to the Calendar icon.
Open sharing and permissions
Right click the calendar you want to share and click Sharing and permissions, or select Share from the top ribbon.
Add the recipient
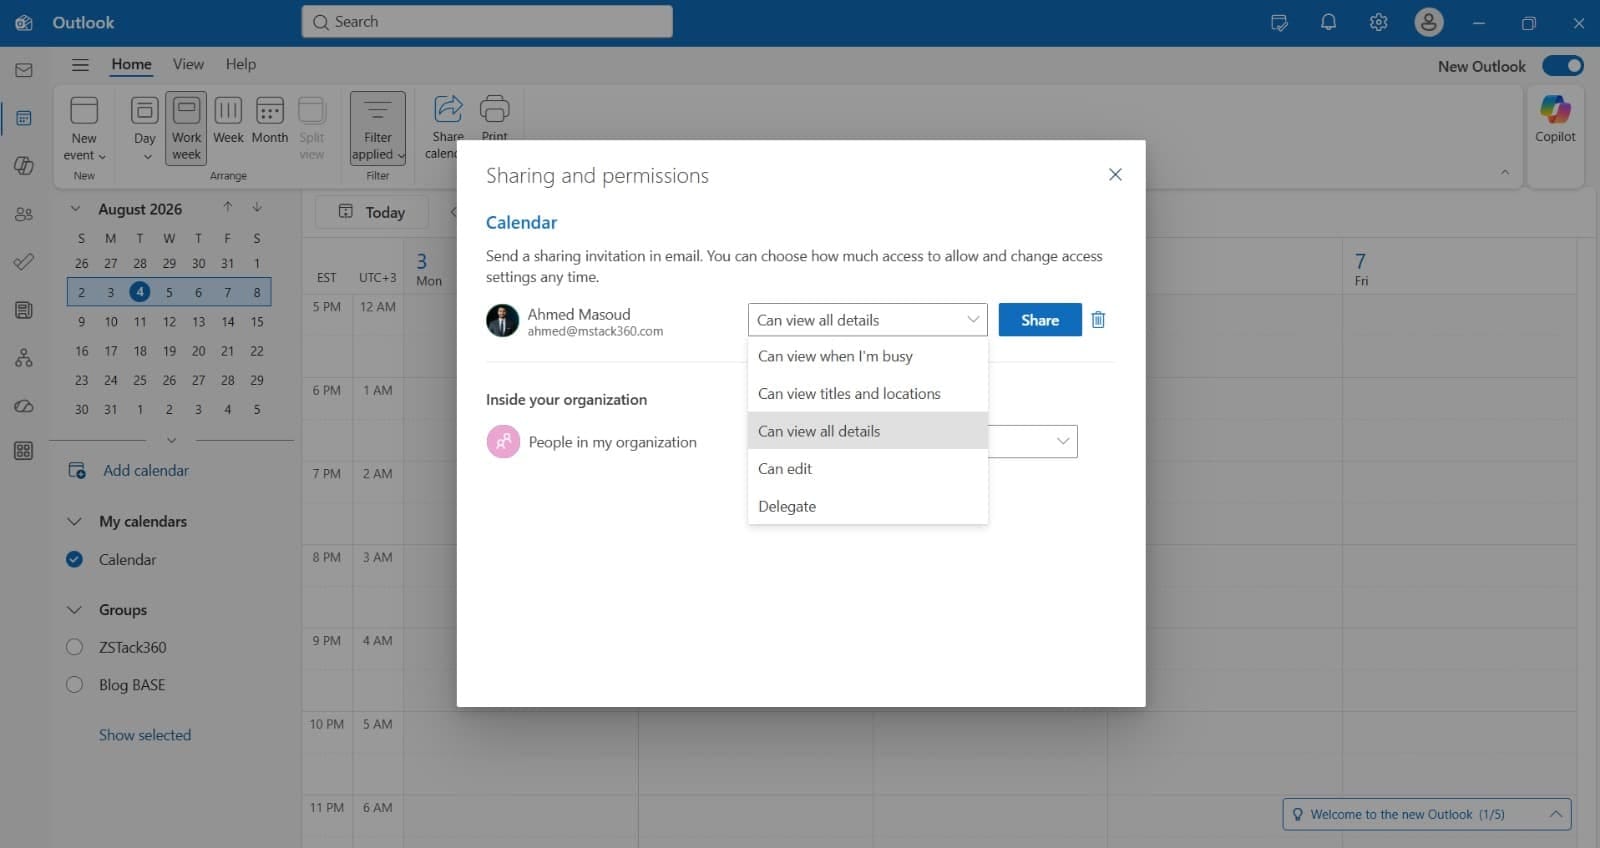
Type in the recipient's email address.
Set their access level
Choose Can view, which lets the person see your scheduled events, or Can edit, which grants full access to add, change, or manage events on your calendar.
Send the invitation
Click Share. Once the recipient accepts, they can view or edit your schedule based on the access you assigned.
Troubleshooting: why is the Share option missing?
If you right click a calendar and find the Share option is completely missing, there is no need to panic. This almost always comes down to a limit on the type of account your calendar is connected to.
Direct calendar sharing natively requires a Microsoft hosted domain, such as an @outlook.com address. If your calendar is connected to a non Microsoft email provider like Gmail, Outlook disables the direct user sharing features.
If you are working across different email domains, switch to Method 1 and publish an HTML link instead. That method shares your calendar smoothly no matter which email provider the recipient uses.
Quick comparison: link vs direct invite
Both methods share your calendar, but they suit different situations. Here is how they line up side by side.
| Feature | Published HTML link | Direct user invite |
|---|---|---|
| Best used for | External clients, contractors, public availability | Internal team members, executive assistants |
| Recipient requirements | None, it opens in any web browser | A compatible Microsoft account |
| Edit permissions | No, view only | Yes, the Can edit option is available |
| How to revoke access | Click Unpublish in settings | Remove the user from sharing permissions |
Want your calendar sharing set up cleanly across the whole team?
Sharing links, direct permissions, and cross domain quirks all behave a little differently depending on how your accounts are set up. We can get it working properly the first time and make sure the right people see the right level of detail.
Book a session with MStack360