
How to onboard a new user in Microsoft 365
When a new employee joins your business, they need their own Microsoft 365 account: email, file access, Teams, and the apps they will use every day. This guide walks you through creating that account correctly and securely, from start to finish. You will need Global Admin or User Admin access to the Microsoft 365 admin center to complete these steps. If you do not have that, contact whoever manages your Microsoft 365 tenant.
Before you start
Have this information ready for the new user, and confirm you have a spare licence available. If not, you will need to buy one during the process.
- Full name
- Job title and department
- Which apps and licence they need
- Their manager or team
- Any shared mailboxes, groups, or sites they should have access to
- A personal email or phone number, used for password recovery and MFA
The nine steps
1
Sign in to the admin center
- Go to admin.microsoft.com
- Sign in with your admin account
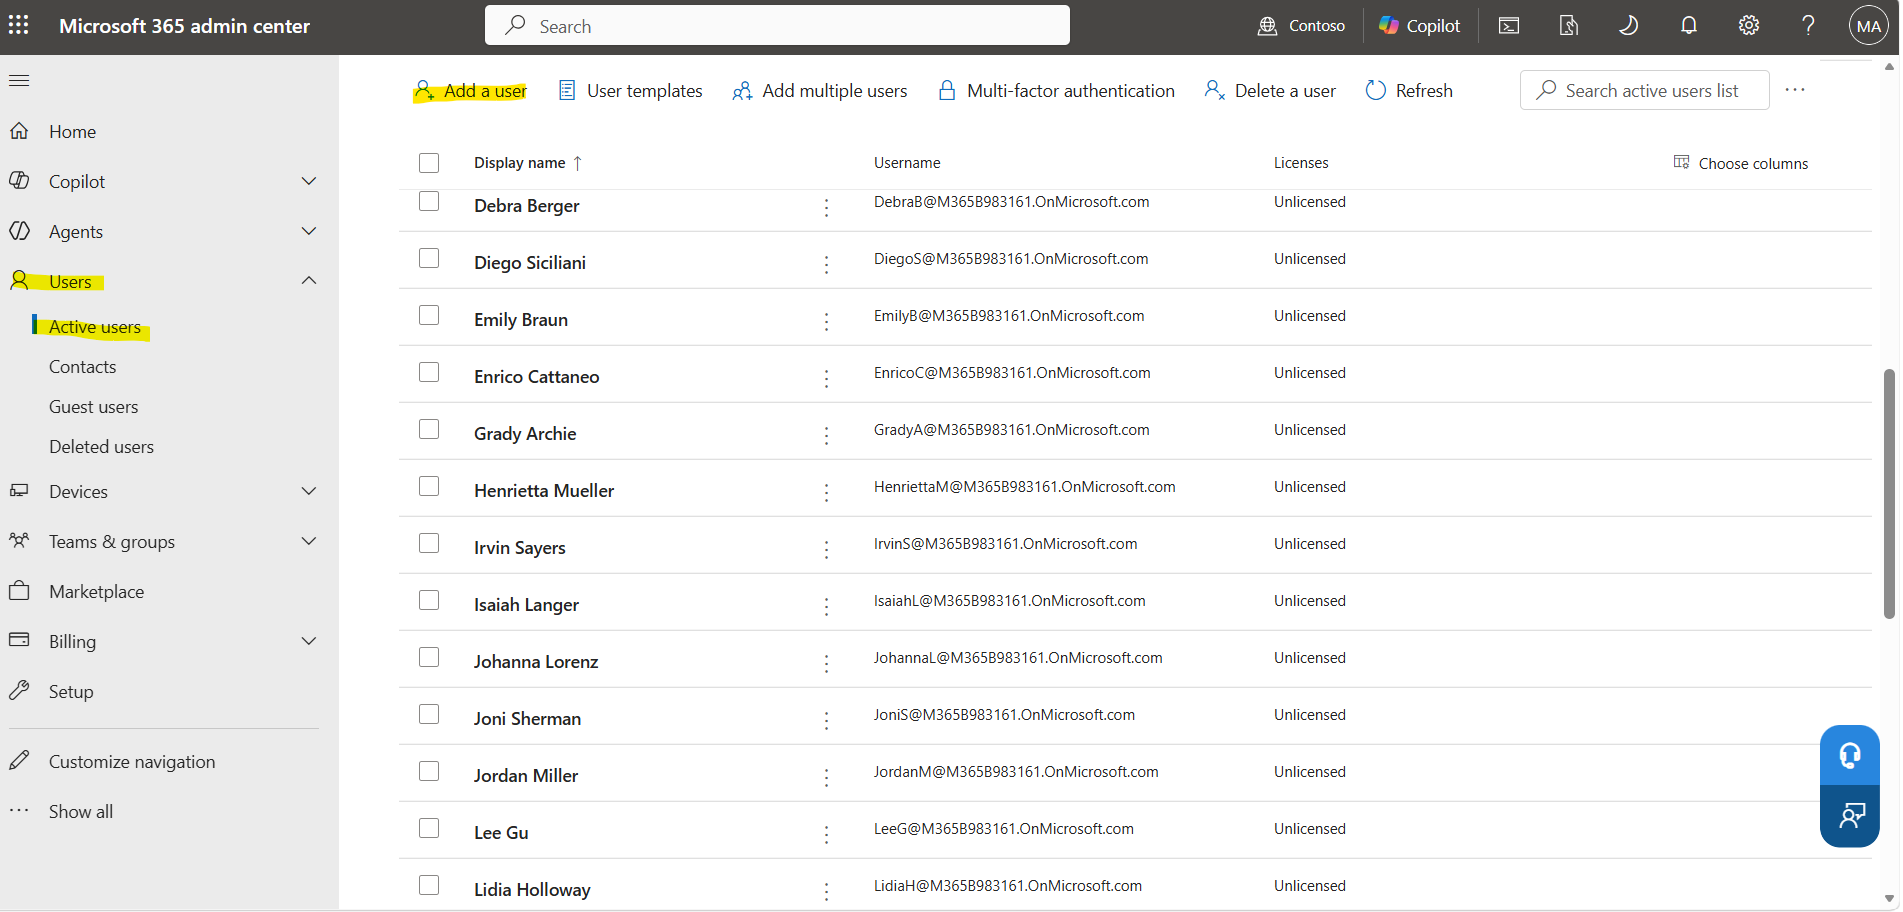
- In the left menu, select Users, then Active users
2
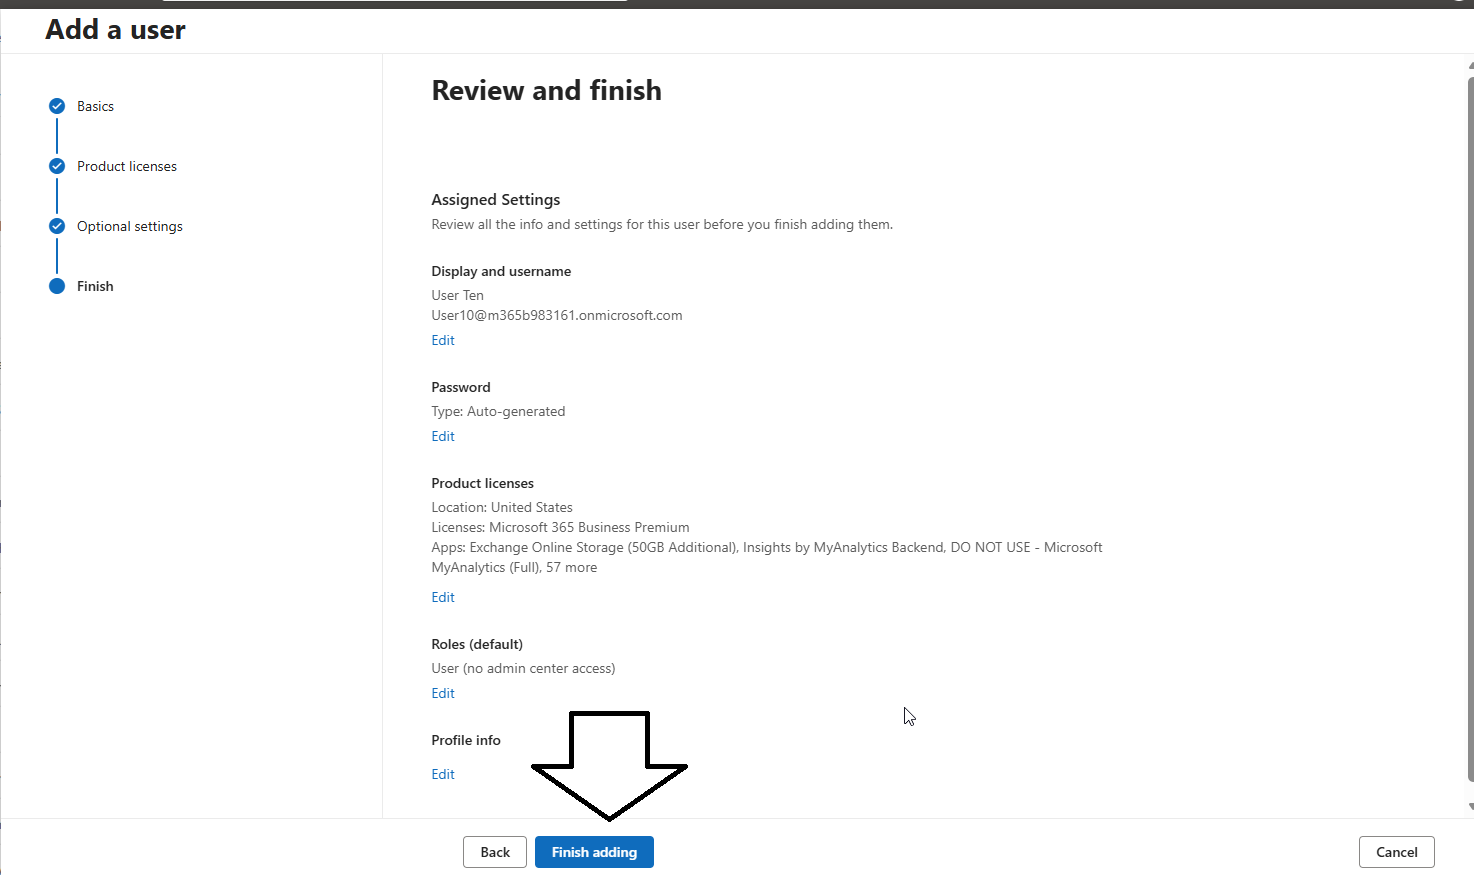
Create the new user
- Click Add a user
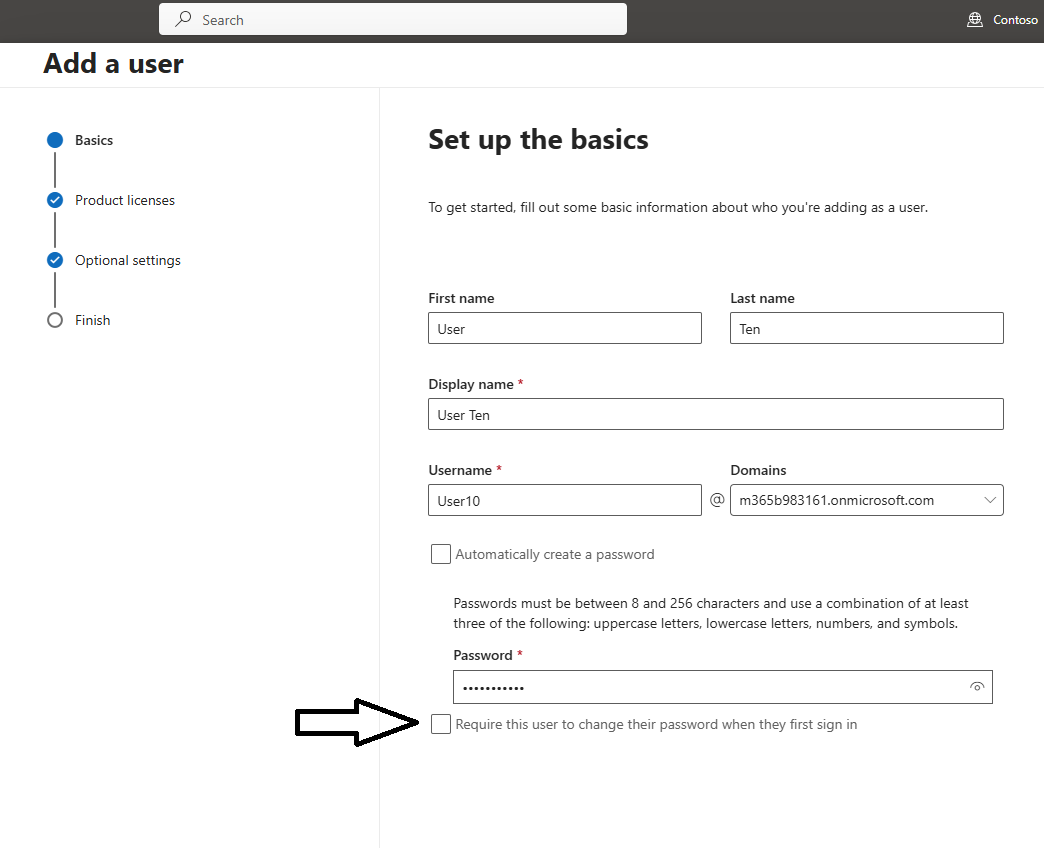
- Enter the person's first and last name
- Set their username. This becomes their email address, for example firstname@yourcompany.com. Keep the format consistent with the rest of the team
- Choose to either auto generate a password or set one yourself
- Tick Require this user to change their password when they first sign in
3
Assign a licence
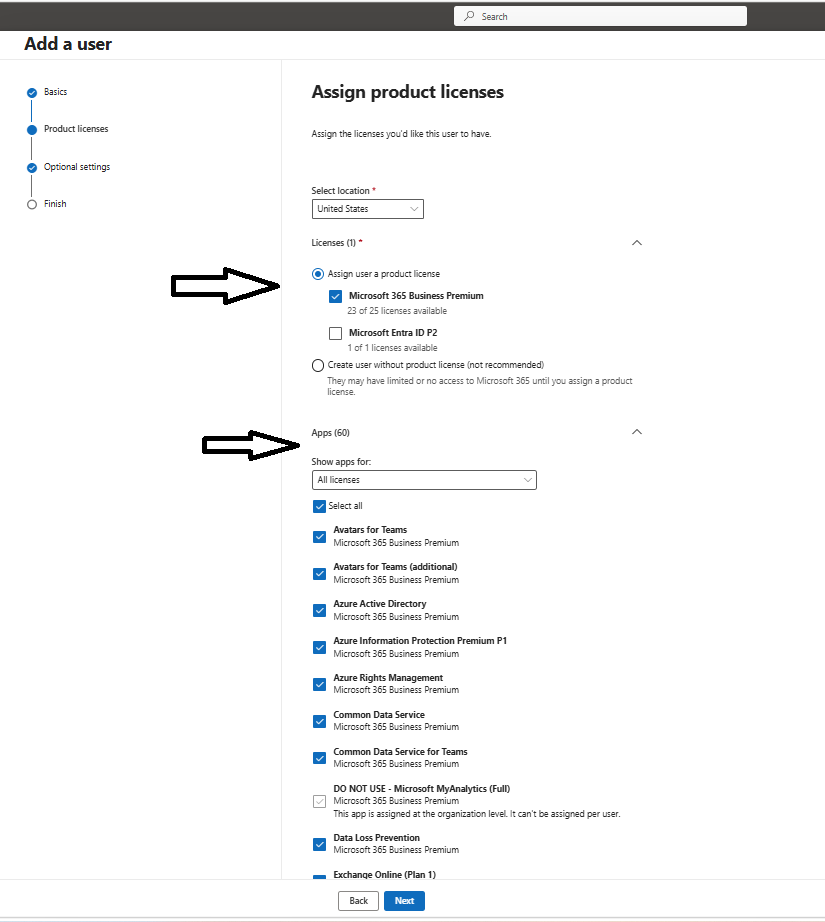
- On the licence step, choose the location (country)
- Select the correct licence for their role, for example Business Standard or Business Premium
- If no licences are available, you will be prompted to buy one
Tip: Assign only the licence they need. You can always add more later.
4
Set roles and profile info (optional)
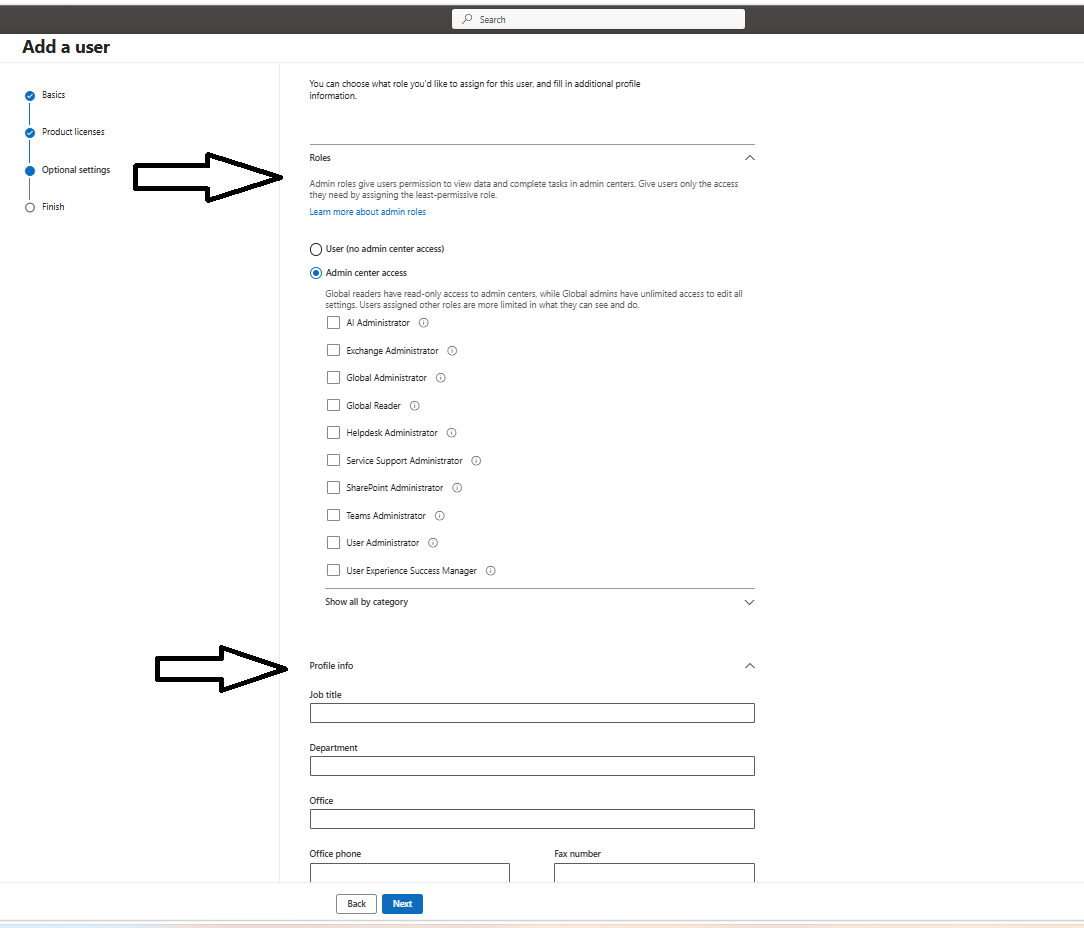
- Leave the role as User unless this person needs admin access. Only grant admin rights when genuinely required
- Add optional profile info: job title, department, office, phone. This helps colleagues find them in the directory
- Click through to finish, then Create user
5
Turn on multi factor authentication
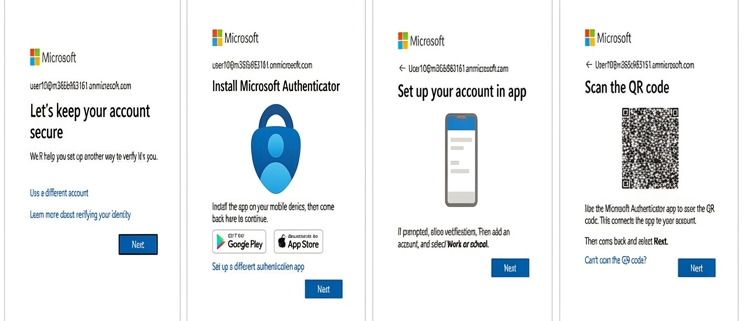
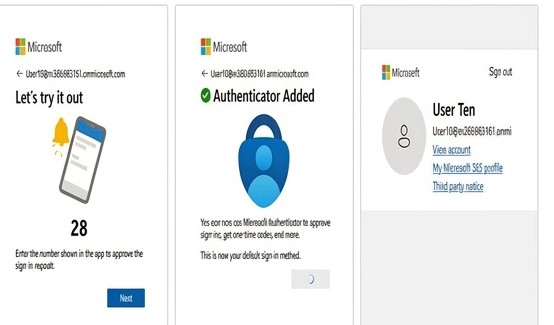
Multi factor authentication, or MFA, links their account to their phone through the Microsoft Authenticator app or a text code. It blocks the vast majority of account hacks. The user will be prompted to set up MFA at first sign in, or you can enforce it through your security settings.
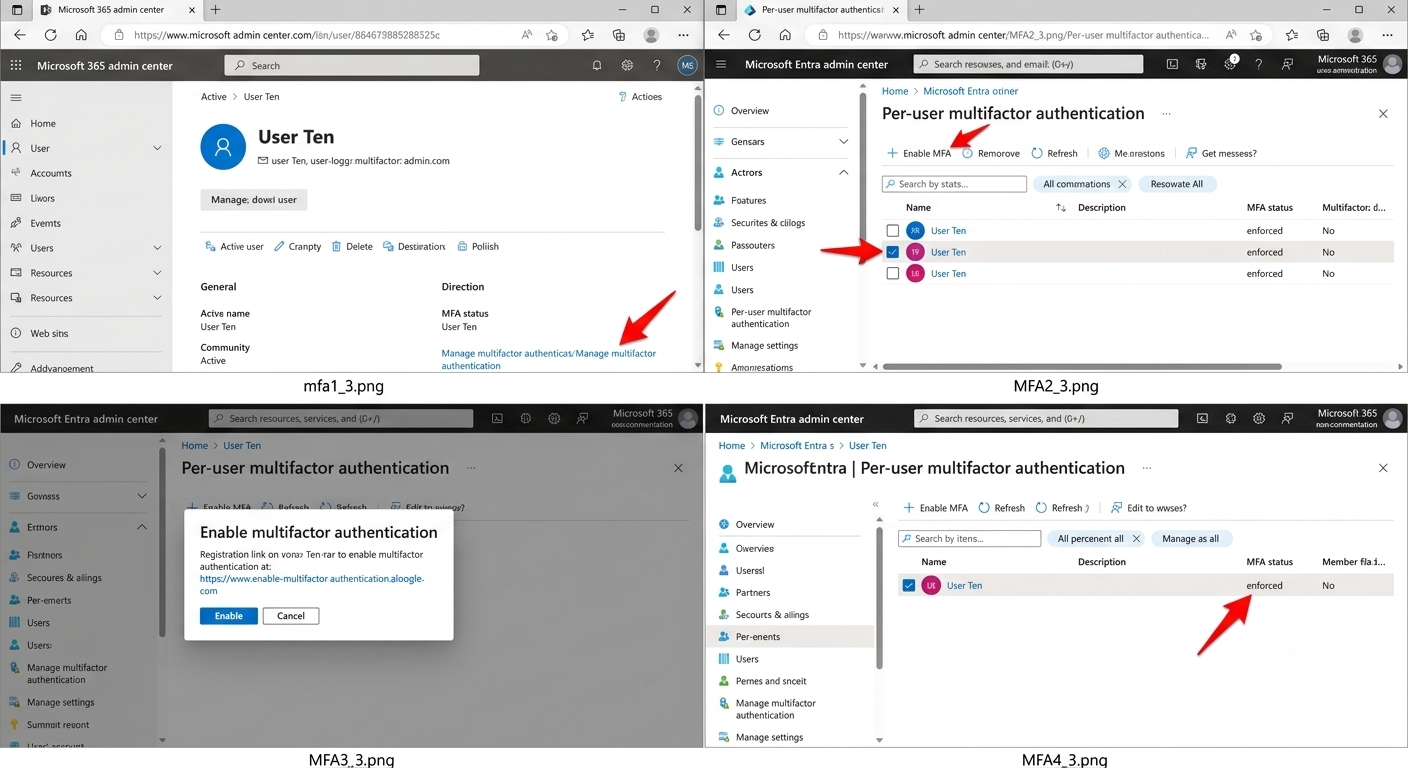
Essential: Never skip this step.
6
Add them to groups and access
Give the new user access to what their role needs.
- Add them to the relevant Microsoft 365 groups or distribution lists
- Add them to the correct Teams and channels
- Grant access to the SharePoint sites and document libraries they will use
- Add them to any shared mailboxes, for example info@ or support@, if required
7
Share the sign in details
- Give the new user their email address and temporary password securely, in person, by phone, or through a secure channel. Not by plain email
- Point them to office.com or the desktop and mobile apps to sign in
- They will be asked to change their password on first login
8
Help them get set up
Make the first day smooth.
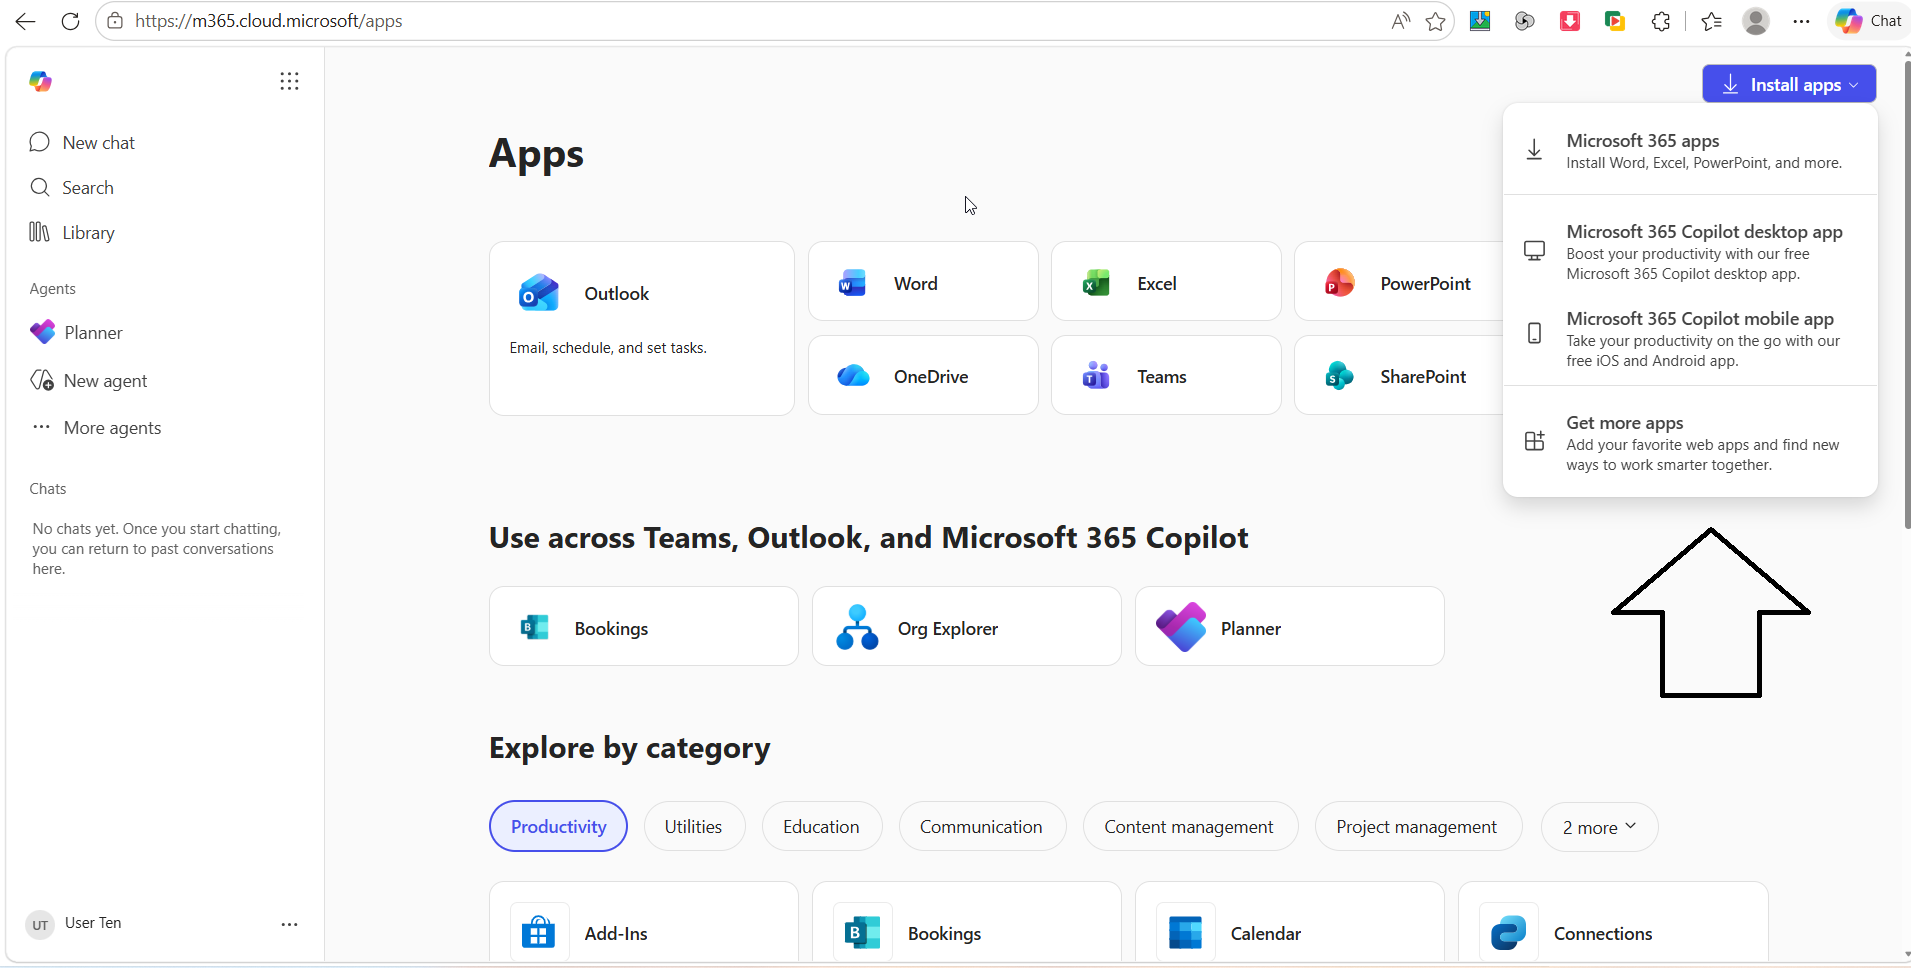
- Install the Office desktop apps on their computer
- Install the mobile apps: Outlook, Teams, and OneDrive
- Confirm they can send and receive email
- Show them where shared files live (SharePoint) and where personal files go (OneDrive)
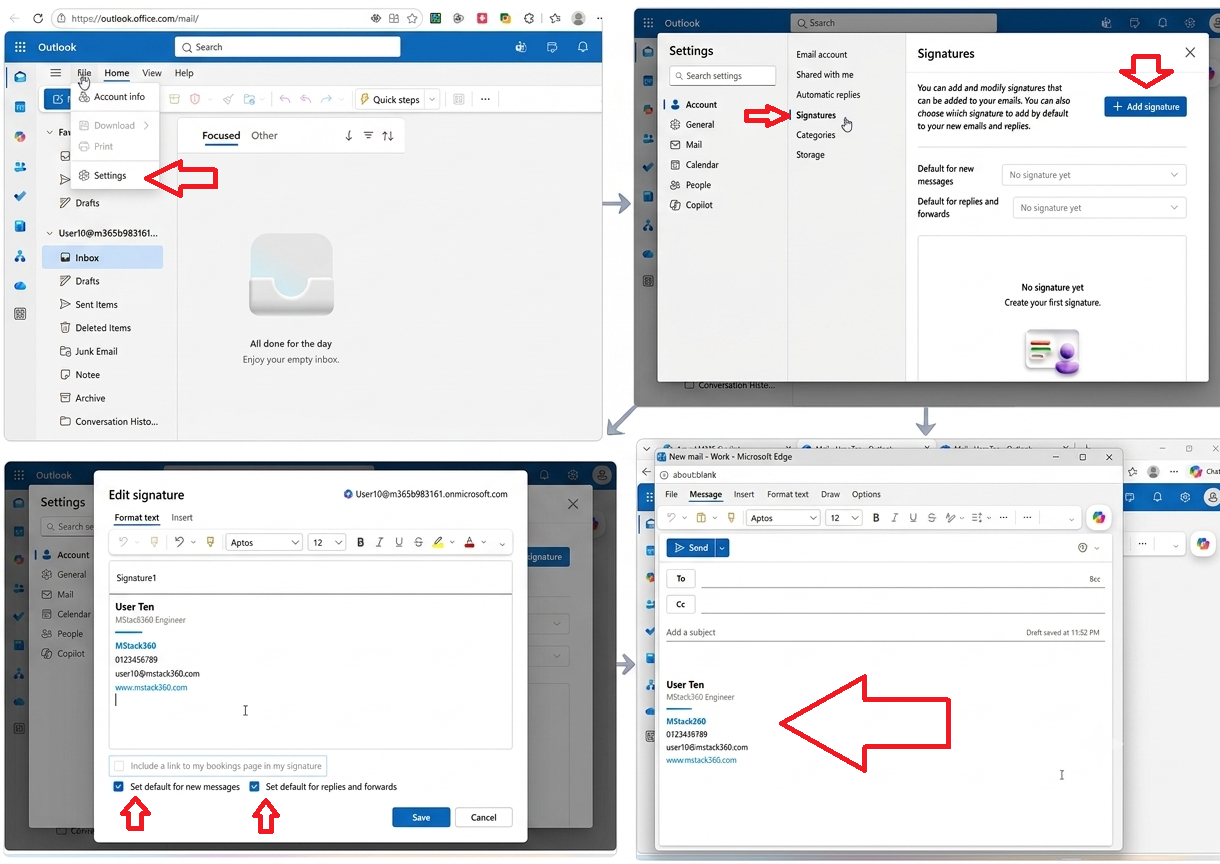
- Set up their email signature
9
Confirm everything works
Before you consider onboarding done, check that:
- They can sign in successfully
- MFA is active
- Email sends and receives
- They can open Teams and see the right channels
- They can access the files and sites they need
A note on offboarding
When someone leaves, do not just delete them. Follow these four steps instead.
- Block their sign in immediately
- Convert their mailbox to a shared mailbox if colleagues still need the emails
- Remove or reassign their licence so you are not paying for unused accounts
- Transfer their OneDrive files to their manager
Need help?
Setting up users, licences, security, and access correctly gets complicated as your business grows. MStack360 can handle it for you, or review and secure your whole Microsoft 365 environment.
Book a session with MStack360