
How to offboard a user in Microsoft 365
When someone leaves your business, you need to remove their access carefully, not just delete their account. Done right, you protect company data, keep what colleagues still need, and stop paying for accounts you no longer use. The safe order is always the same: secure the account first, preserve the data, remove the licence, and only delete the account last.
The offboarding steps in order
Block sign in immediately
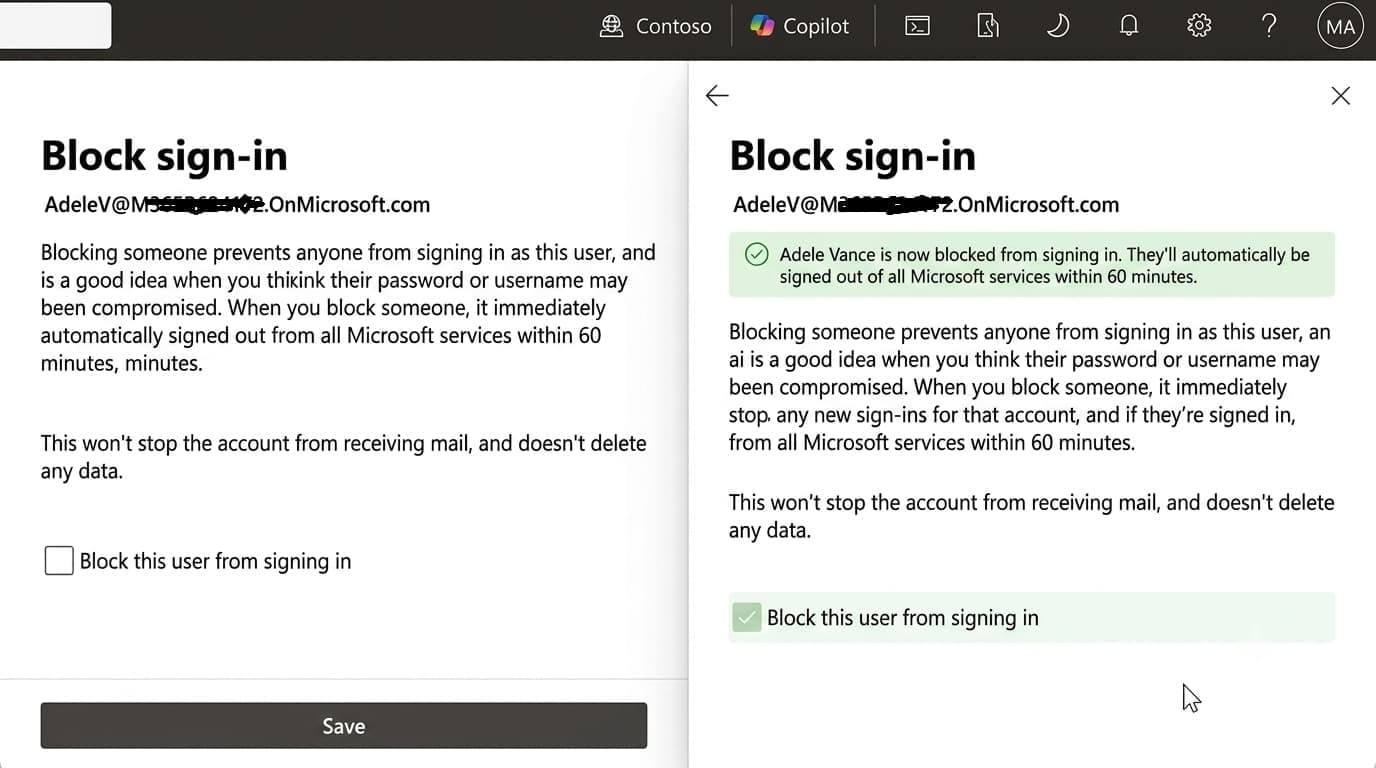
This is the first and most important step. Do it the moment their access should end. It instantly stops them logging in from anywhere, on any device, while you handle the rest at your own pace.
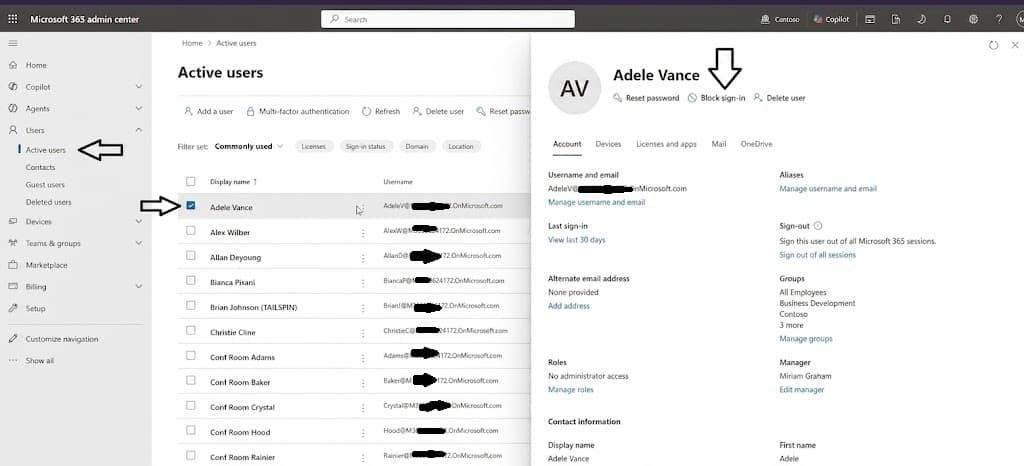
- Go to admin.microsoft.com and sign in.
- Select Users, then Active users.
- Click the departing person's name.
- Select Block sign in and confirm.
Reset the password
As an extra safeguard, reset their password so no one, including the former employee, can access the account during offboarding.
- On the user's page, select Reset password.
- Set a new password. You don't need to share it with anyone.

Sign the user out of all sessions
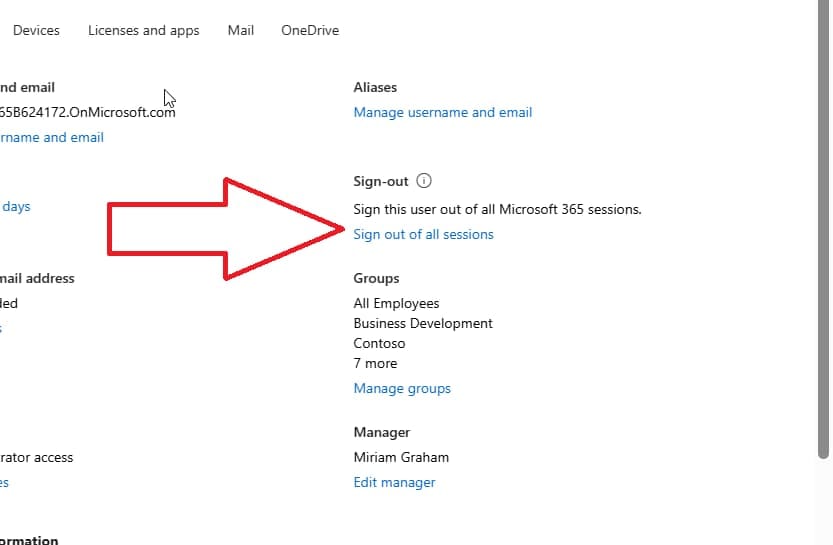
Blocking sign in stops new logins, but active sessions can linger. Force them out everywhere.
- On the user's page, select Sign out of all sessions.
- This revokes their access tokens across email, Teams, and mobile apps.
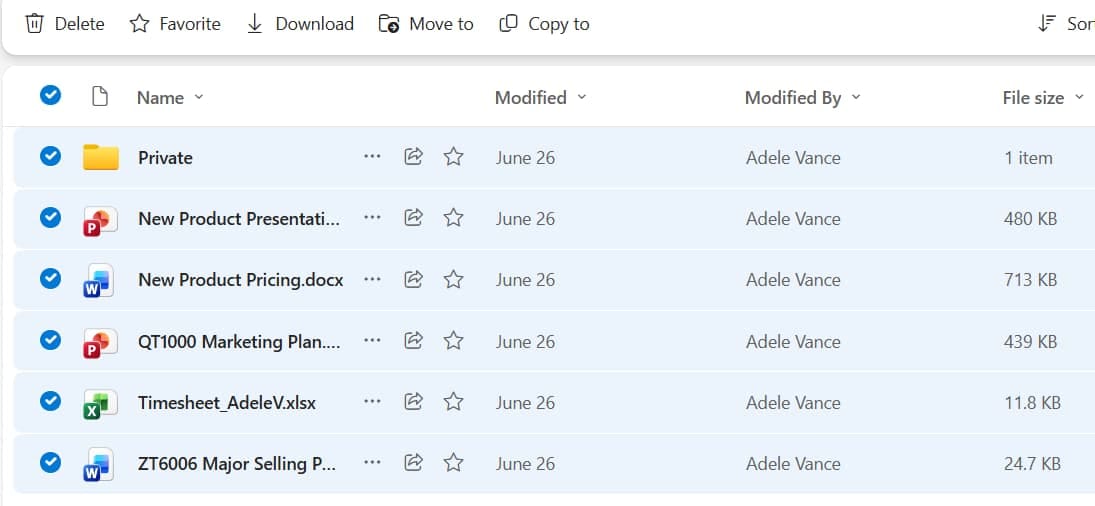
Back up or transfer OneDrive files
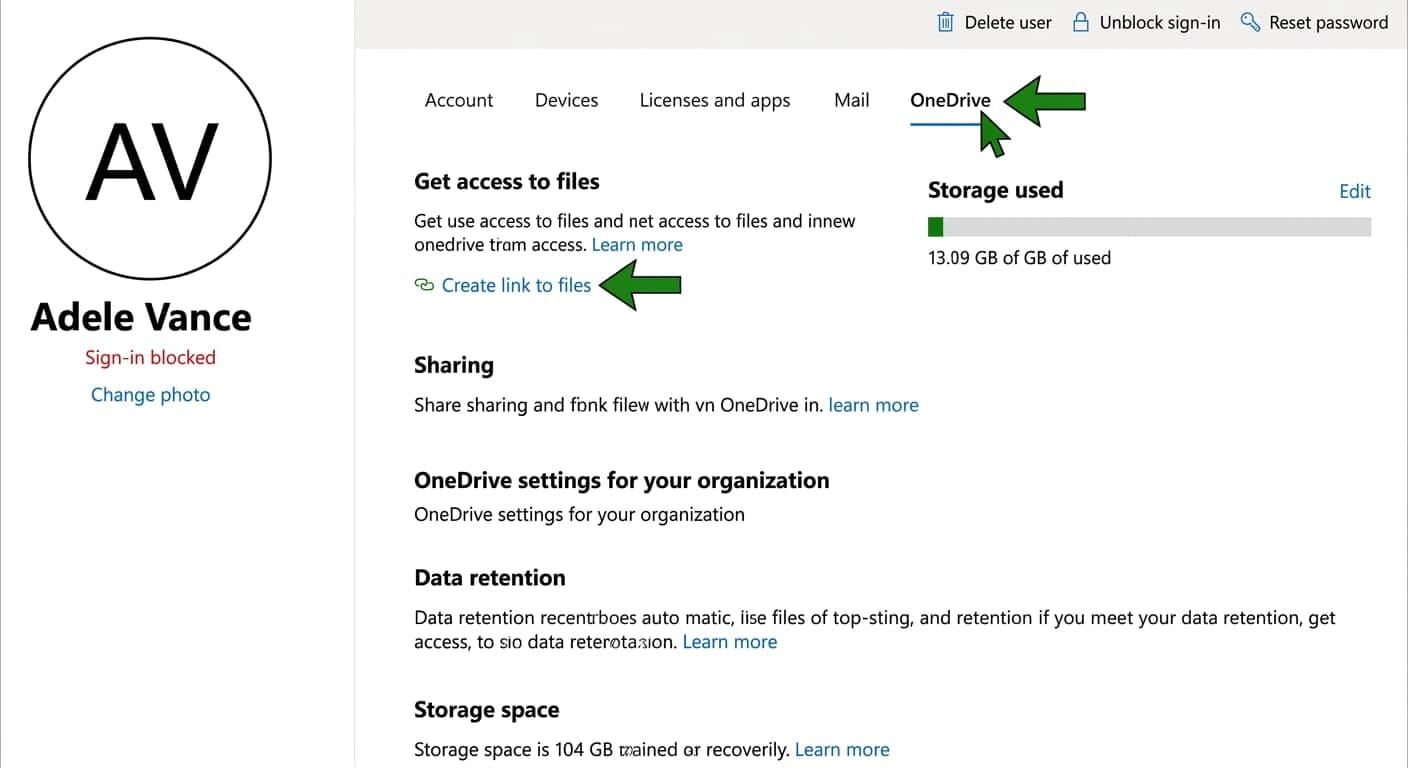
The departing person's personal work files live in their OneDrive. Preserve them before the account is removed.
- Give the manager or a colleague access to the leaver's OneDrive so they can retrieve what's needed. Do this from the user's page under OneDrive settings, or in the OneDrive admin center.
- Move important files into a shared SharePoint location or the manager's OneDrive.

Handle the mailbox
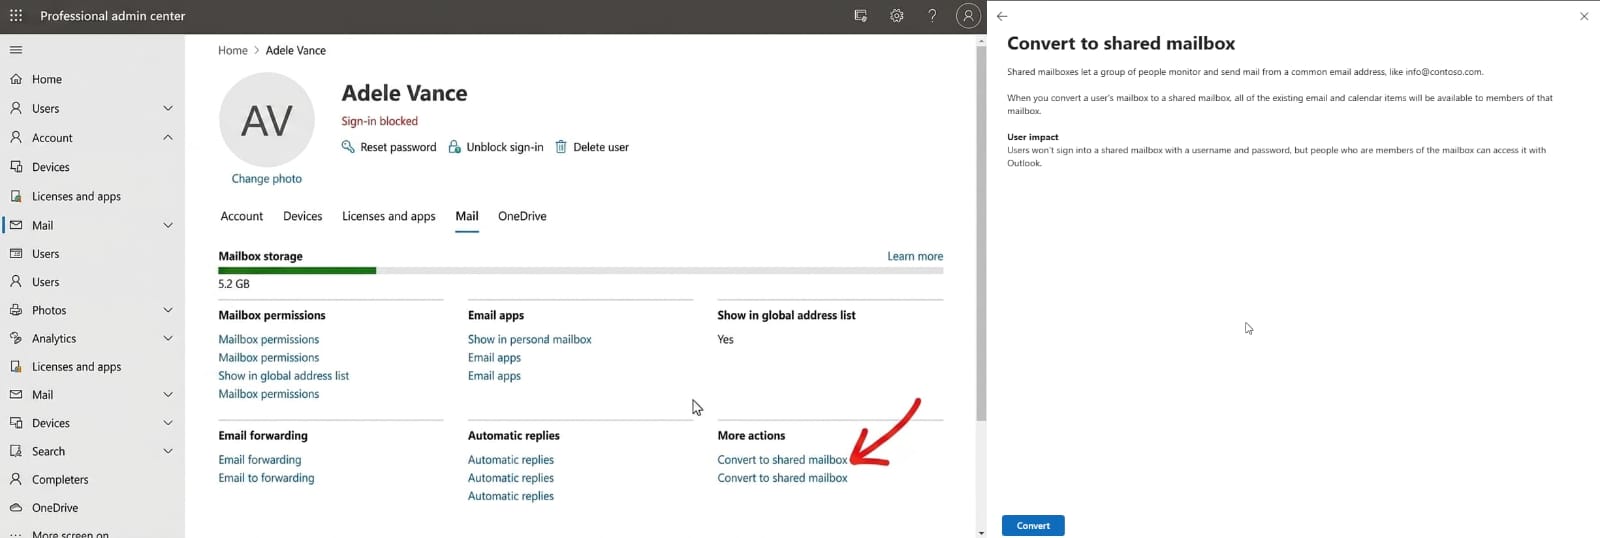
Their email often contains information colleagues still need. Don't just delete it. Choose one of these two approaches.
This keeps all the emails accessible to colleagues, and a shared mailbox under 50 GB does not need a paid licence. Give the manager or relevant team access so the business keeps receiving and reading mail sent to that address.
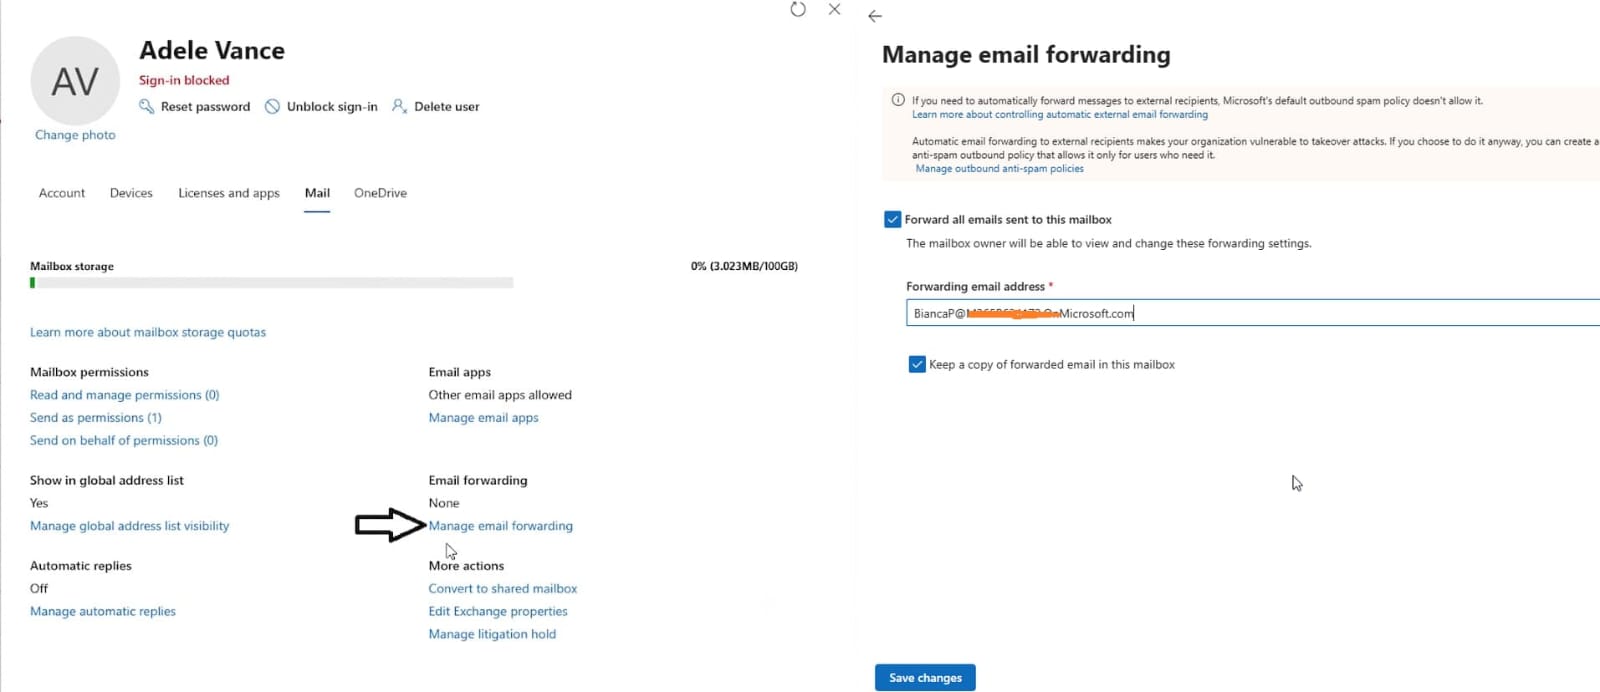
If you just need incoming mail redirected, forward from their address to a colleague. You can combine this with an auto reply letting senders know who to contact instead.
Remove from groups, Teams and shared access
Clean up everything the account was connected to.
- Remove the user from all Microsoft 365 groups and distribution lists.
- Remove them from Teams and channels.
- Remove their access to SharePoint sites and shared mailboxes.
- Revoke access to any third party apps or services they signed into with their work account.
Remove the licence
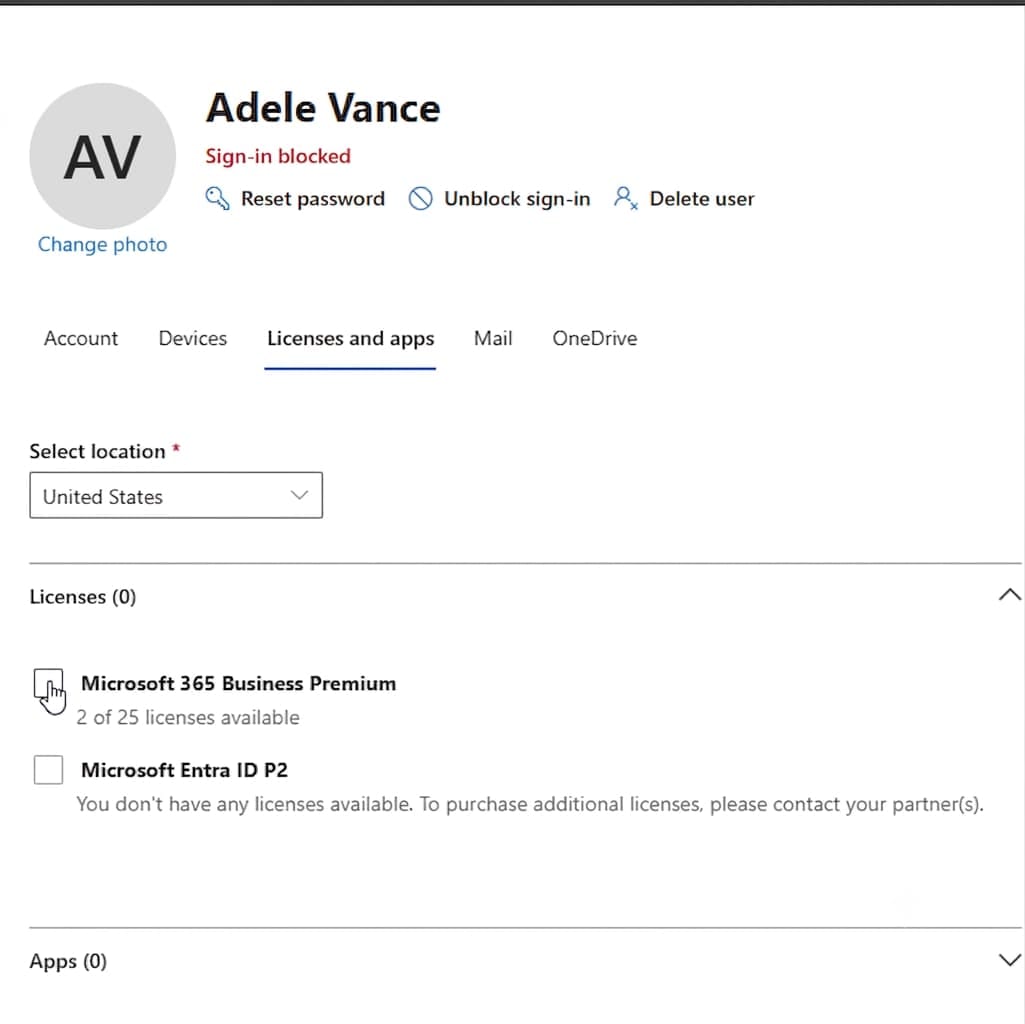
Once the mailbox and files are handled, free up the licence so you stop paying for it. You can then reassign that licence to a new hire.
- On the user's page, select Licences and apps.
- Uncheck the assigned licence and save.
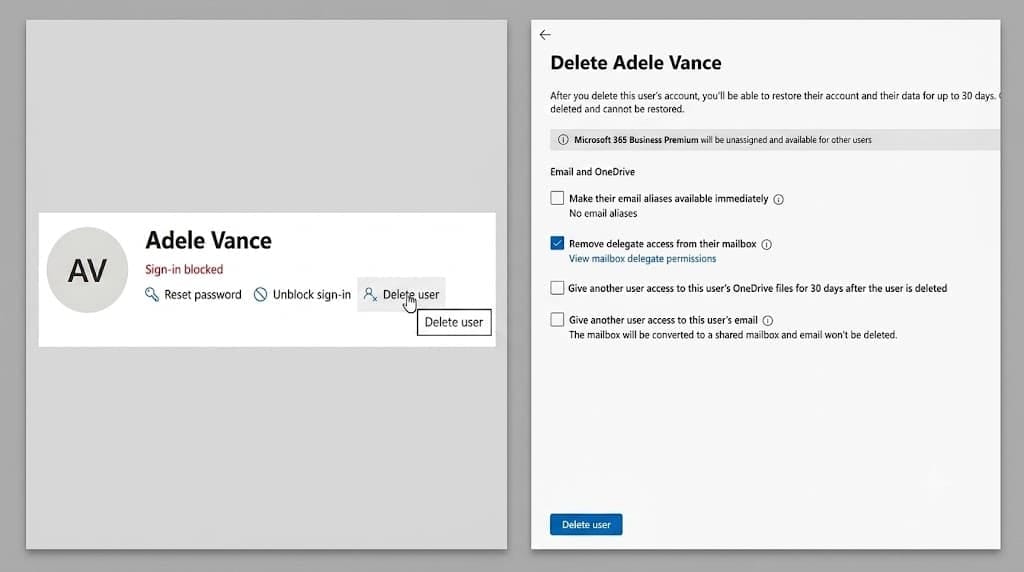
Delete the account, when ready
Only delete once you're confident nothing more is needed from the account.
- On the user's page, select Delete user.
- The account moves to a deleted users state and can be restored for 30 days if you made a mistake. After 30 days it's permanently removed.
Offboarding quick order
- Block sign in
- Reset password
- Sign out of all sessions
- Back up or transfer OneDrive files
- Convert mailbox to shared, or forward
- Remove from groups, Teams, shared access
- Remove the licence
- Delete the account, when ready
Offboarding correctly, preserving data, protecting security, and avoiding wasted licence costs, matters more than most businesses realise. If you'd like this handled for you, or want a proper joiner and leaver process set up for your team, MStack360 can take care of it.
Book a call with MStack360