Watch Video
Join us on our YouTube channel for an in-depth video on Google Workspace to Microsoft 365 Migration, where we explore every step of the migration process, tackle common challenges, and share best strategies for a seamless switch.
▶ Watch the full migration videoWhat Can Be Migrated
You can migrate the following functionalities from Google Workspace to Microsoft 365 or Office 365:
Emails
Calendars
Contacts
Prerequisites for Google Workspace to Office 365 Migration
To ensure a secure migration, certain prerequisites must be met in both Google Workspace and Microsoft 365.
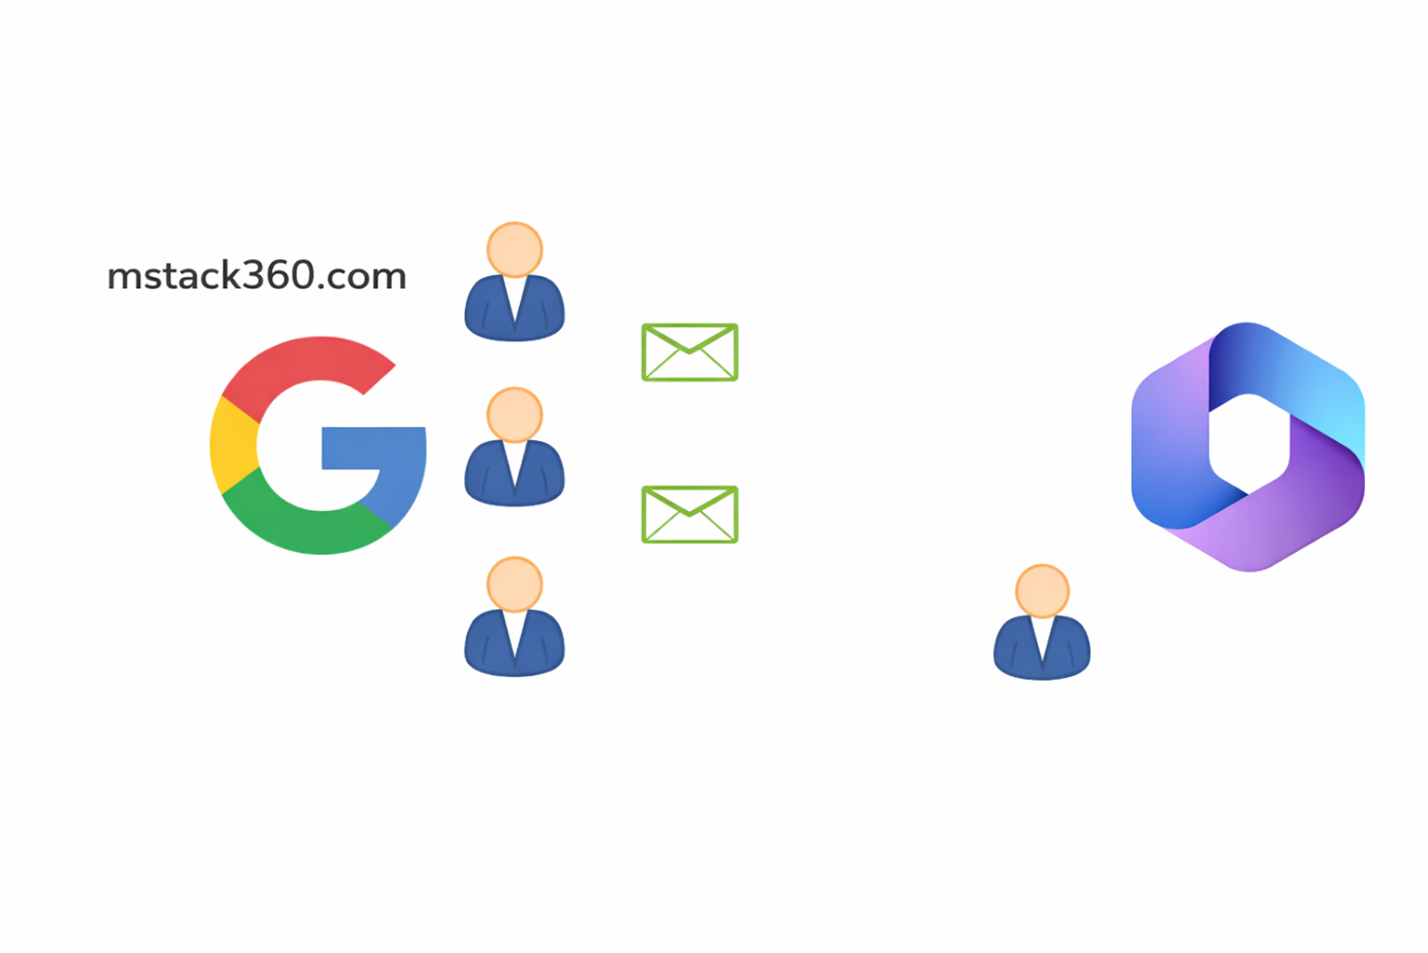
This migration is performed in batches. Therefore, users who are already migrated and users who are not yet migrated must be able to exchange emails without disruption.
Example scenario:
If you have three user accounts in Google Workspace and one user is migrated to Microsoft 365, the remaining users must still be able to send emails to the migrated user.
If you have three user accounts in Google Workspace and one user is migrated to Microsoft 365, the remaining users must still be able to send emails to the migrated user.


Understanding Routing Domains
In an Exchange Hybrid deployment, a Routing Domain (domain.mail.onmicrosoft.com) is used to route emails from on-premises to Microsoft 365.
To route emails from Microsoft 365 back to on-premises, the External Email Address attribute is used.
In the same way, when migrating from Google Workspace to Microsoft 365, we need a routing domain to ensure emails flow correctly between migrated and non-migrated users.

How to Migrate Google Workspace to Office 365
Let’s move to the lab and walk through the migration process step by step. We will meet all prerequisites and then migrate mailboxes from Google Workspace to Microsoft 365.
Step 1
Create a Subdomain in Google Workspace
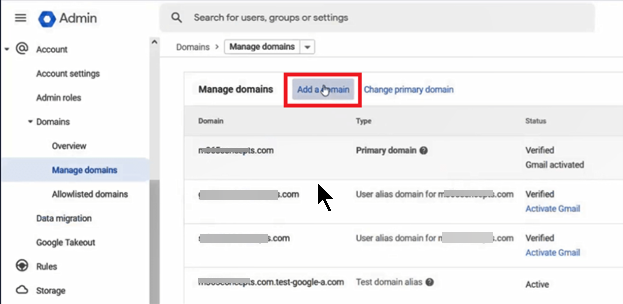
We start by creating a subdomain in Google Workspace. Navigate to Account → Domains and click Manage Domains.

Step 2
Add the New Domain
Click Add a domain to begin creating the subdomain that will be used during the migration process.
Step 3
Configure the Subdomain and Verify It
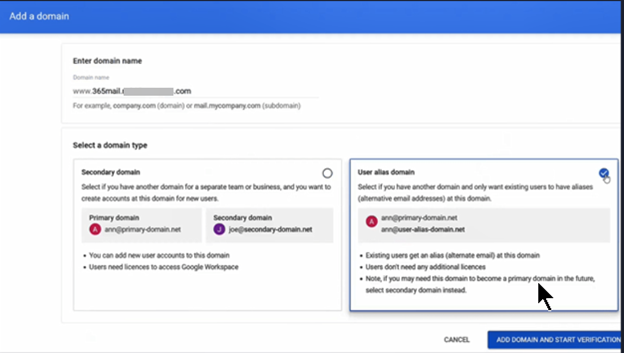
Type the subdomain name and select User alias domain. This adds the subdomain to all users as a secondary email address. Click Add domain and start the verification process.
Note:
You don’t need to verify ownership of this subdomain because the parent domain is already verified in Google Workspace.
This subdomain will be used to route emails from Google Workspace to Microsoft 365 during the migration.
In this example, contoso.com is already verified in Google Workspace and used by all users. Its MX record points to Google Workspace, allowing users to receive emails from the internet.
Step 4
Add the Subdomain to Microsoft 365
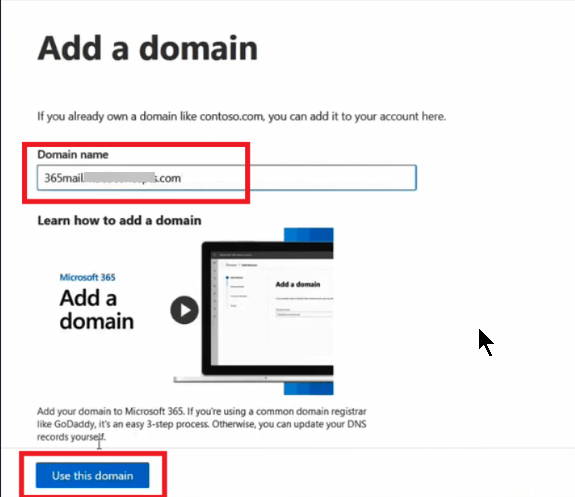
Go to Microsoft 365 Admin Center → Settings → Domains, click Add domain, and enter the subdomain name 365mail.contoso.com.
Click Use this domain. This subdomain will be used as a secondary email address for mail users during the migration.
Important:
The parent domain contoso.com is already verified in the Microsoft 365 tenant because it will be used for migrated users.
The MX record for this domain is still pointing to Google Workspace. Make sure you only verify the domain in Microsoft 365 and do not add or change MX records at this stage.
The parent domain contoso.com is already verified in the Microsoft 365 tenant because it will be used for migrated users.
The MX record for this domain is still pointing to Google Workspace. Make sure you only verify the domain in Microsoft 365 and do not add or change MX records at this stage.
Step 5
Create a Subdomain for External Email Routing
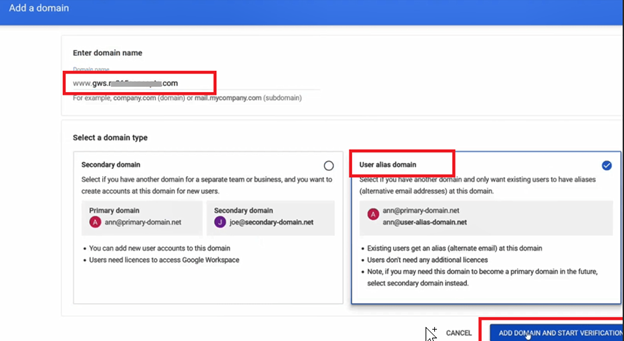
Go back to Google Workspace and create another subdomain. This subdomain will be used to route emails from Microsoft 365 to Google Workspace.
In the Google Admin dashboard, navigate to Account → Domains → Manage Domains → Add a domain. Enter gws.contoso.com, select User alias domain, then click Add domain and start verification.
Step 7
Assign Secondary Email Addresses to Mail Users
Now we need to assign a secondary email address to the mail users created in Exchange Online. This address will be used to receive emails from Google Workspace.
In the Exchange Admin Center, go to Mailboxes, open the mailbox properties of a mail user, and under Email addresses click Manage email address types.
Steps to add the secondary email address:
- Click + and select SMTP
- Type the initials or username
- Select the domain 365mail.contoso.com
- This email address will be used to receive emails from Google Workspace
- Click Save
Repeat this process for all mail users. If you have a large number of mail users, you can use a PowerShell script instead of configuring them one by one.
Step 8
Assign Permissions to the Google Workspace Admin Account
The next step is to assign required permissions to the Google Workspace Admin account.
Open a new browser tab and go to:
https://console.cloud.google.com/cloud-resource-manager
Create a new project:
- Click Create Project
- Enter a project name
- Select your domain under Organization
- Click Create
Assign permissions:
- Select your Organization name or domain
- On the right side, under Permissions, click Add principal
- Under Add Principal, enter the Google Workspace admin email address
- Under Assign Roles, select Project Creator
- Click Add another role
- Search for Create service accounts
- Click Save

Note:
Once these permissions are assigned, you might need to wait up to 24 hours for the changes to replicate.
Once these permissions are assigned, you might need to wait up to 24 hours for the changes to replicate.
Step 9
Enable Required APIs
The next step is to enable the required APIs. On the same page, click the three-line menu, then go to APIs & Services → Library.

Prerequisites Completed
With this step completed, all required prerequisites are now in place, and you are ready to start the Google Workspace to Office 365 migration process.
With this step completed, all required prerequisites are now in place, and you are ready to start the Google Workspace to Office 365 migration process.
Step 10
Create a Migration Batch in Exchange Admin Center
Now we will start the actual migration process. Go to the Exchange Admin Center, navigate to Migration, and click Add migration batch.
Migration batch configuration:
- Provide a name for the migration batch
- Select Migration to Exchange Online
- Select migration type: Google Workspace
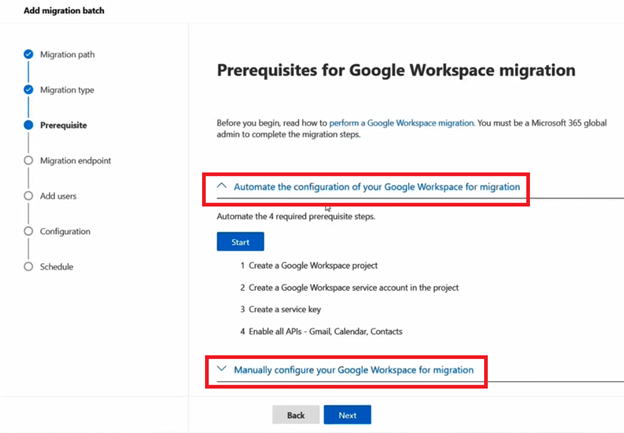
The migration batch wizard will validate whether all prerequisites are met. There are two ways to validate the prerequisites: Automatic or Manual.
Step 11
Configure Google Workspace Access and Migration Endpoint
If you select Manual, the wizard will ask you to complete all prerequisite checks manually. If all prerequisites are already met, you can click Start under Automate the configuration of your Google Workspace for migration.
Automated configuration steps:
- Download the JSON file when prompted (this will be used later)
- Once all checks are completed, copy the Client ID
- Click the link next to API access
- Paste the Client ID
- Go back to the Exchange Admin Center and copy the Scopes
- Return to the Google page and paste the scopes under OAuth scopes
- Click Authorize
After authorization is completed, go back to the Exchange Admin Center and click Next.
Create the migration endpoint:
- Click Create a new migration endpoint
- Click Next
- Enter a name for the Migration Endpoint
- Click Next
- Under Email Address, enter the Google Workspace admin account on which Project Creator and Create Service Accounts permissions were assigned
- Import the JSON file downloaded earlier
- Click Next
Step 12
Add Users, Complete Migration, and Switch MX Records
Under Add users, add the mail users that you want to migrate to Exchange Online.
CSV file format:
- Create a CSV file with a column named EmailAddress
- Add the email addresses of the mail users in the rows
- Save the file in CSV format
Under Target Delivery Domain, enter the Microsoft 365 subdomain: 365mail.contoso.com.
Click Next, then click Save to start the migration batch.
Once the migration is completed, go to Microsoft 365 Admin Center → Active Users and assign licenses to the migrated users. Make sure the assigned licenses include Exchange Online.
After the Google Workspace to Office 365 migration is completed for all users, update the MX record to point to the Microsoft 365 tenant.
Migration Completed
At this stage, mailboxes are fully migrated, users are licensed, and email flow is now handled by Microsoft 365.
At this stage, mailboxes are fully migrated, users are licensed, and email flow is now handled by Microsoft 365.