Microsoft 365 Business Setup Step by Step Guide
Table of Contents
This guide walks you through setting up Microsoft 365 for business the right way, step by step, in the order that actually makes sense.
Microsoft 365 Business Setup Step by Step Guide
Here’s the thing.
Setting up Microsoft 365 for your business is not complicated. But doing it cleanly and correctly from day one is what makes the difference later.
So let’s walk through the full Microsoft 365 Business setup process, without overthinking it.
Why Microsoft 365 Is Worth Setting Up Properly
What I love most about Microsoft 365 is that it grows with you.
You usually start with professional email and Office apps. Then you realize you also get Teams, security controls, file sharing, and user management, all in one place.
Professional Email
Your business identity starts with a clean, reliable email setup.
Work Anywhere
Access files, emails, and apps securely from any device.
Built-in Security
Microsoft 365 includes security features many businesses overlook.
Scales With You
Add users, services, and controls as your business grows.
Never buy Microsoft 365 through GoDaddy. It limits admin control, complicates security, and makes future migration painful. Always purchase Microsoft 365 directly from Microsoft or a proper Microsoft Partner.
Choosing the Right Microsoft 365 Business Plan
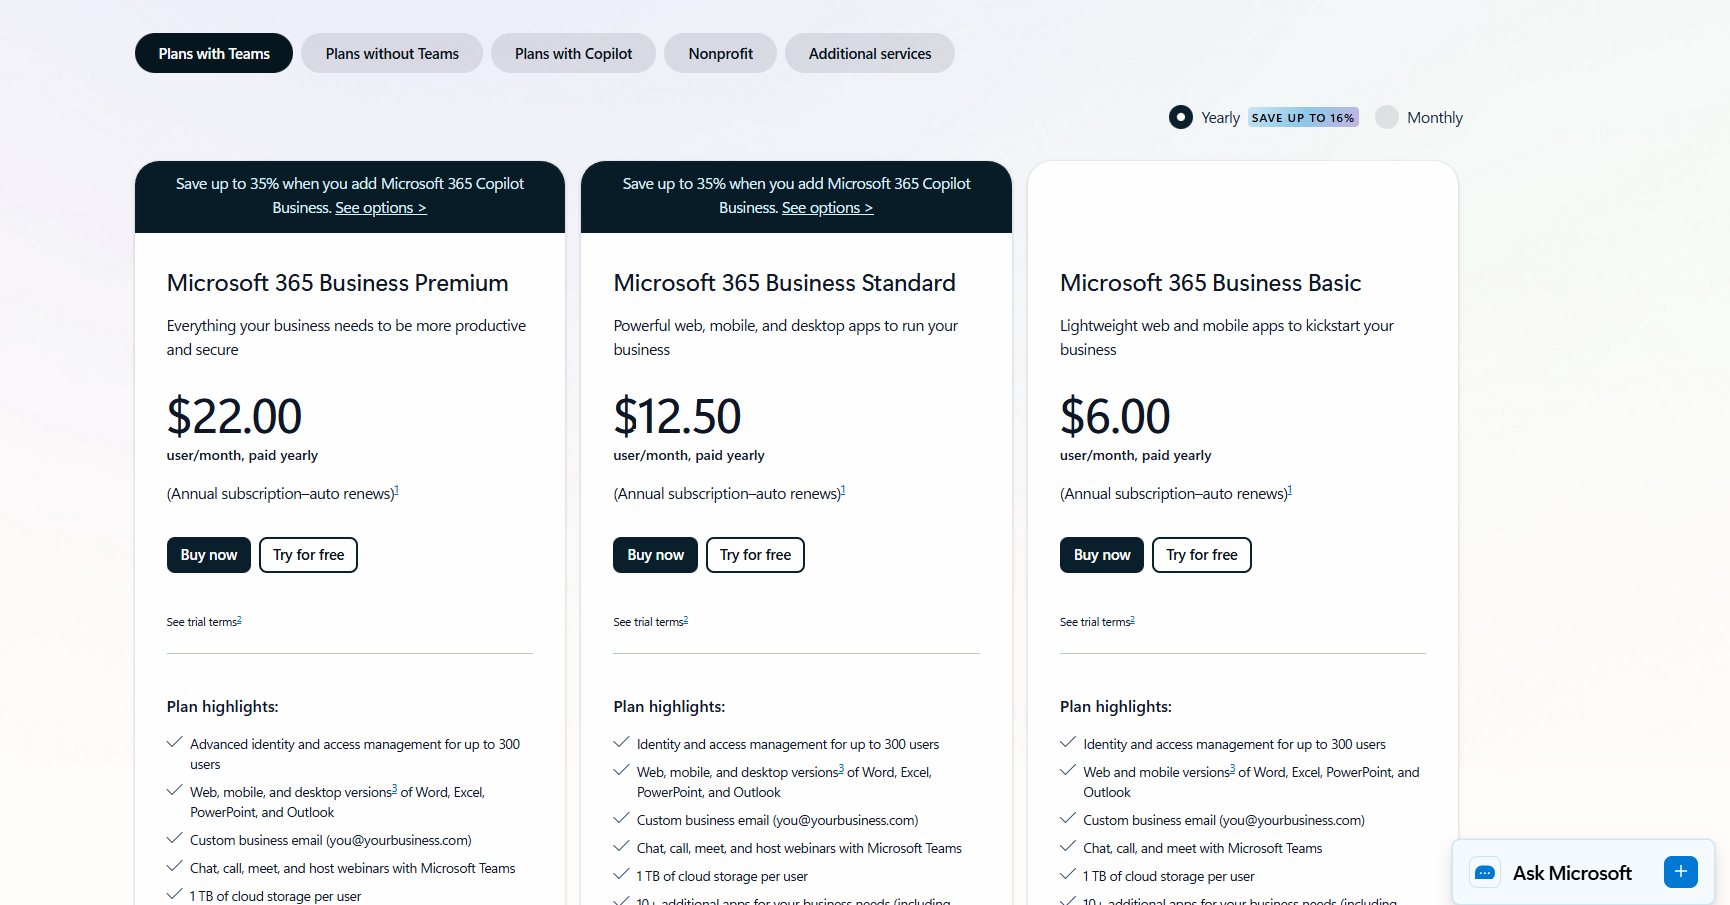
When you first look at Microsoft 365 business plans, you’ll usually see three main options: Business Basic, Business Standard, and Business Premium.
For most small businesses, Microsoft 365 Business Standard is the best starting point. It gives you everything most teams need without adding unnecessary complexity.
Business Basic
- Web and mobile Office apps
- Business email
- Microsoft Teams meetings
Business Standard
- Desktop Office apps
- Professional business email
- Microsoft Teams with meeting recordings
Business Premium
- Everything in Standard
- Advanced security features
- Device and endpoint management
At the time of setup, Business Standard costs around $12.50 per user per month and usually includes a one-month free trial.
Licensing can get confusing as your business grows.
I’ve written a separate guide that explains Microsoft 365 license differences in plain language:
Microsoft 365 Licenses Explained – Part 1
Creating Your Microsoft 365 Admin Account
This is where your Microsoft 365 journey really begins. The goal here is simple: create a clean admin account that you fully control from day one.
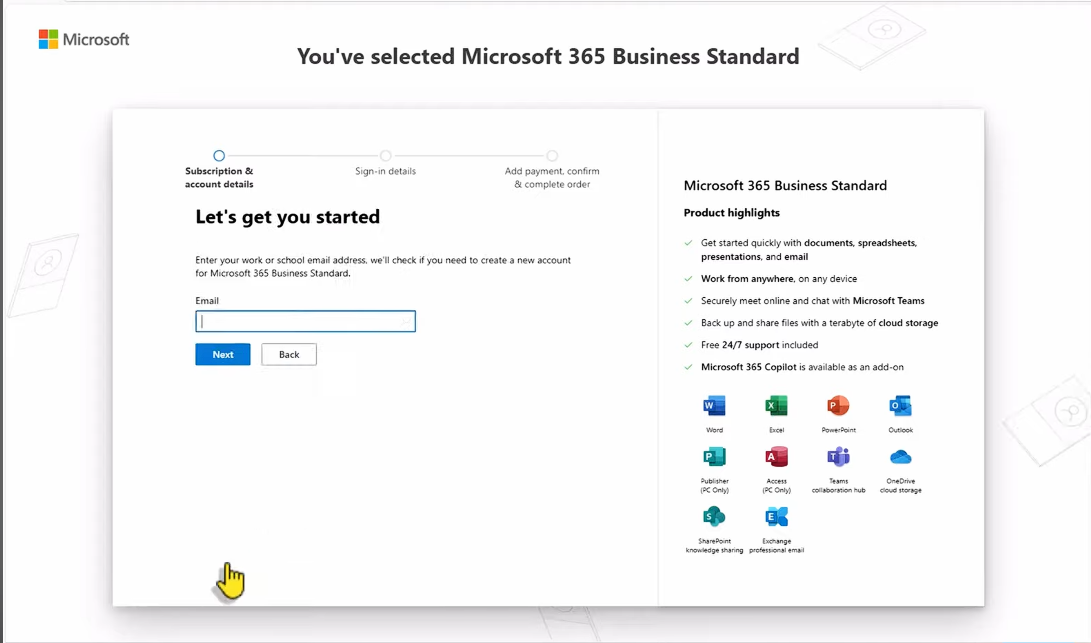
1. Navigate to the Microsoft 365 Business Standard page
- Go to the Microsoft 365 Business Standard product page
- Click the “Buy now” button
2. Enter your personal email address
- Use your personal email (Gmail, Yahoo, etc.)
- This email is used for Microsoft communication and account recovery
- Click Next
3. Create your account
- Enter your name, phone number, and required details
- You’ll receive a verification code by email
- Enter the code to confirm your account
4. Set up your business information
- Enter your business name
- Select your country or region
- Microsoft assigns a temporary domain like yourcompany.onmicrosoft.com
- Don’t worry, you’ll add your real domain later
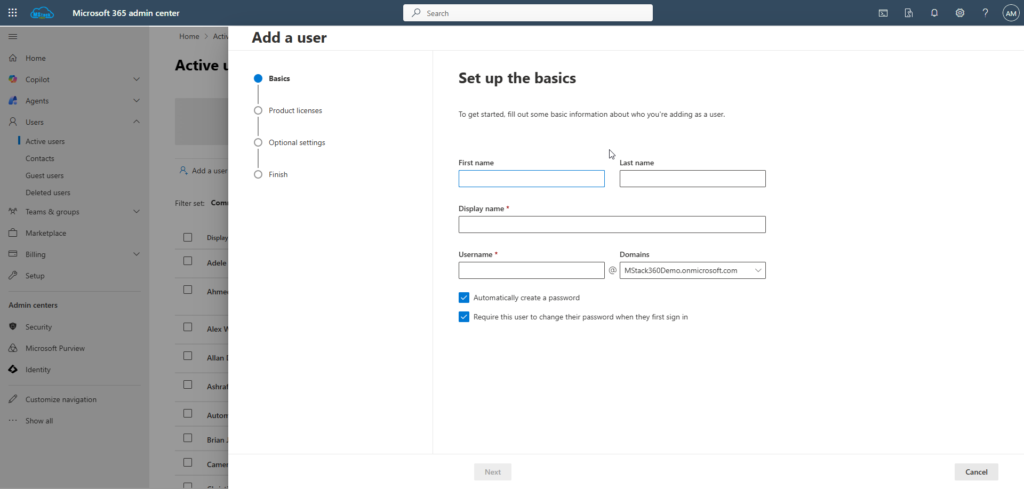
5. Create your admin account
- Choose a username (example: admin@yourcompany.onmicrosoft.com)
- Create a strong password
- Store these credentials securely
6. Select your plan and payment
- Choose how many licenses you need
- Enter your payment details
- Complete the purchase
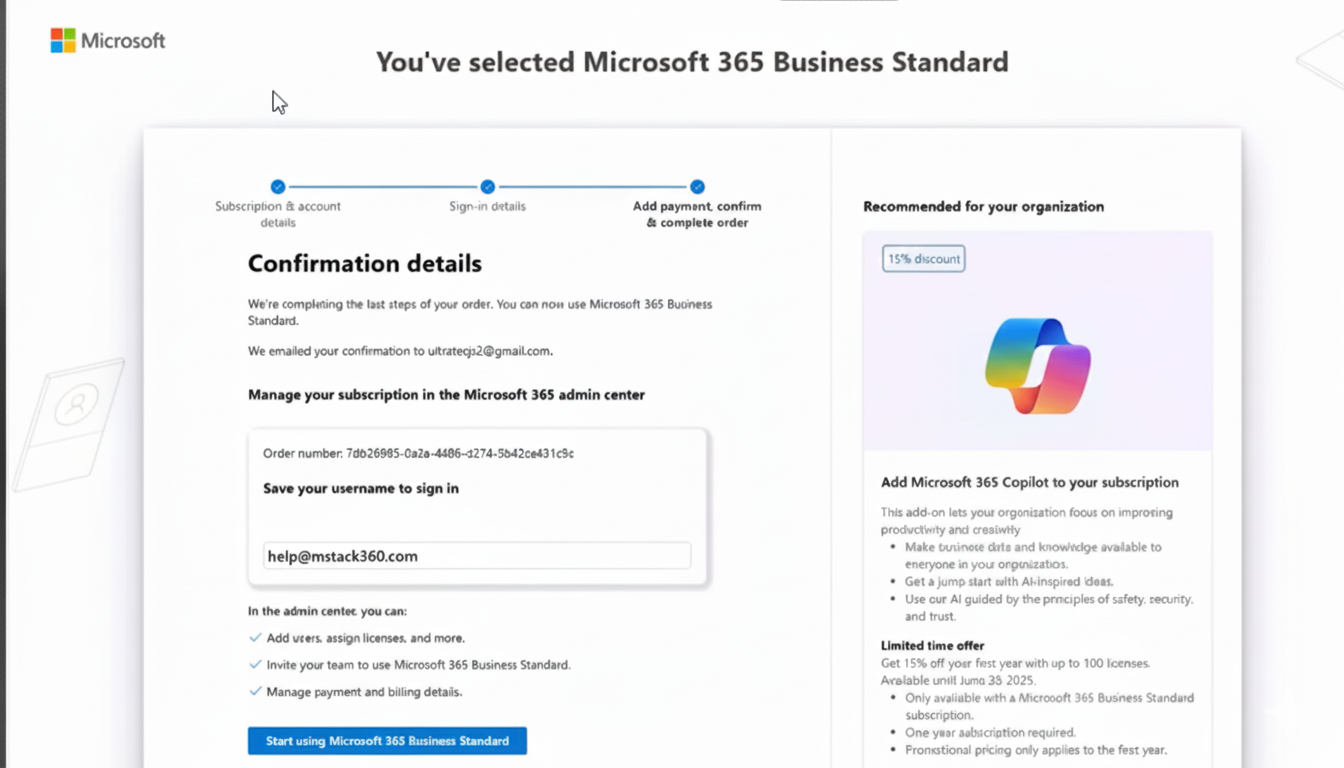
7. Access the Microsoft 365 Admin Center
- After purchase, you’ll be redirected to the Admin Center
- This is where you manage users, security, licenses, and settings
Need ongoing Microsoft 365 help?
At MStack360, we support businesses on a retainer basis. We help you secure Microsoft 365, automate daily work, and keep everything running smoothly, without you needing to figure it out alone.
Book a Microsoft 365 Strategy CallSecuring Your Account with MFA
Before doing anything else, enable Multi Factor Authentication.
Honestly, I’ve been there. Skipping security “for later.” That’s usually how problems start.
MFA takes a minute and protects your entire tenant.
Next Steps
Once your Microsoft 365 tenant is secure, these are the logical next steps. You don’t need to do everything at once, just follow the order.
Buy & Connect Your Custom Domain
Use your real business domain instead of the temporary onmicrosoft.com address.
Install Microsoft 365 Apps
Install Outlook, Word, Excel, and Teams on all required devices.
Create Business Email Accounts
Set up professional email addresses for each user.
Test Email Flow
Send and receive emails internally and externally to confirm everything works.
Use Shared Mailboxes
Create shared inboxes like info@ or support@ without extra licenses.
Configure Microsoft Groups
Control access to files, emails, and permissions more efficiently.
Set Up Microsoft Teams
Organize chats, meetings, and collaboration by department or project.
Set Up SharePoint
Create a central, secure place for company documents and collaboration.
Final Thoughts
Nobody likes emailing a business that’s still running on Gmail.
A proper Microsoft 365 setup gives you credibility, security, and room to grow. And as you’ve seen, it’s not hard when you follow the right steps in the right order.
Community Question
What part of setting up Microsoft 365 gave you the most trouble? Domains, licenses, or email migration?
If this guide helped, share it with someone who’s still setting up their business email.
And if you want help setting this up, or cleaning up an existing tenant... you can book a free 15-minute call with me. No pressure. We’ll just take a look and see what makes sense.
Meet Ahmed
Ahmed Masoud
Microsoft 365 Consultant specializing in Migration, Setup, Automation, and providing Dedicated, Ongoing Support to optimize your business operations.